Showing posts with label Tutorial. Show all posts

Monday, October 10, 2011

Fixing Warped PP Plastics

So, last week saw the release of the 2-player Starter Box, which is chock full of plastic-y goodness.

For the 0.1% who haven't heard about the box it contains two roughly 20 point armies for Khador and Protectorate of Menoth.  Khador adds a full unit of Man-O-War Shocktroopers to their standard Battlebox, landing at an even 20 points.  


The Protectorate, however, swaps out the Revenger Light 'jack Arcnode for a second heavy with the Vanquisher.  To counter the Shocktroopers, Menoth sends a squad of Cinerators, with some equally as impressive shields.  The Protectorate side adds up to 21 points.


I was very excited to support my local store with an immediate purchase, and my local players were equally as eager to check out the contents, namely the miniature Rulebook!

When I got the models home, I tore open the plastic bags to quickly inspect the set for any missing pieces,  or anything irreparable which I would need to get replaced.  Luckily, I was in the clear.  Until...

Tuesday, August 9, 2011

Storm Strider: Cleanup & Assembly

Mold Shelf
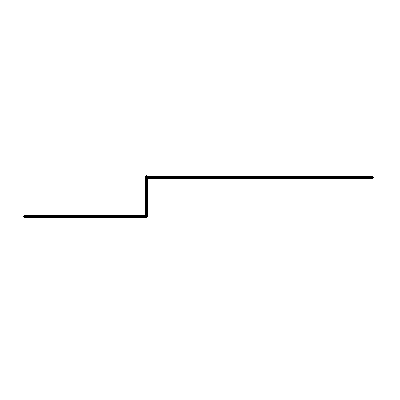
One of the most common issues miniatures have are mold lines.  These form because the mold wasn't properly sealed when the two halves were joined, or if the mold is overfilled and the material squeezes through the small gaps. This forms "flash" which is fairly easy to scrape off with a hobby knife.

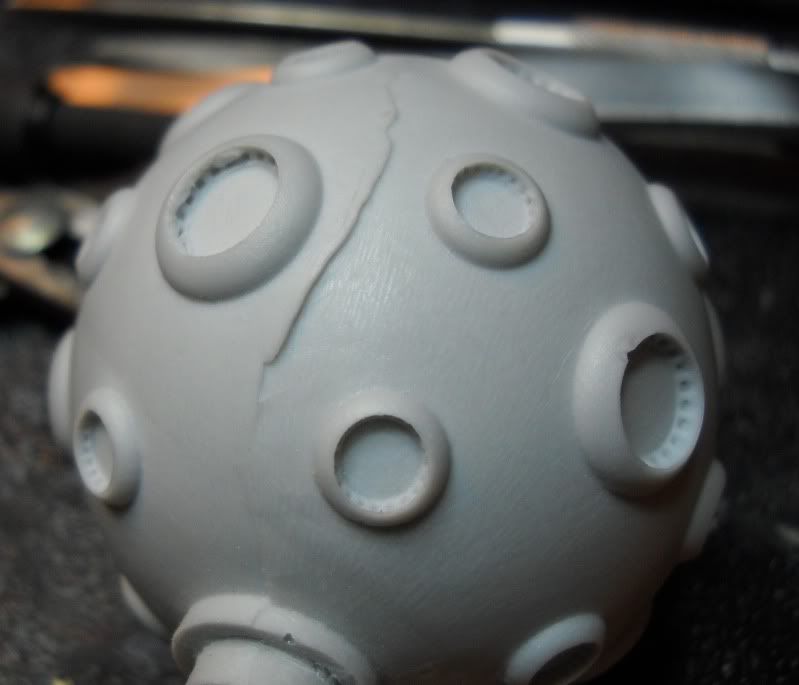
The second way mold lines are formed is when the mold is not properly aligned, what I call "mold shelves" are the result.


First Cut
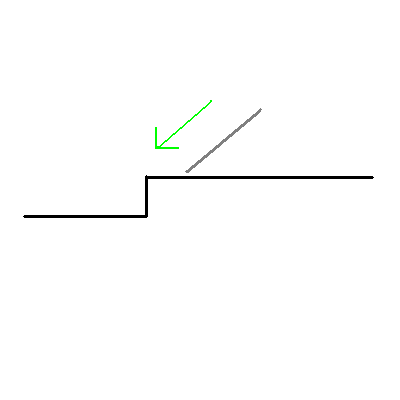
Rather than just start filing or sanding, I like to smooth the step.  The first step is to cut off that sharp protrusion with my hobby knife.  Remember, this happens along a long line, so I cut the entire ridge

The general idea is to do in a few second what would take several minutes with a file.  The knife should slice right through the ridge, whereas the file has to turn all that spare material into dust.

You don't have to be very pretty right now, this meant to be a time saver.

Smoothing the Hill


Once that initial cut is done, you should have a hill instead of a shelf.  It's steep enough that it's noticeable, but it doesn't stand out nearly as much as as the shelf did.  The next step is to smooth that hill.  We need a shallower gradient to hide the fact that the part wasn't molded correctly.


More Smoothing


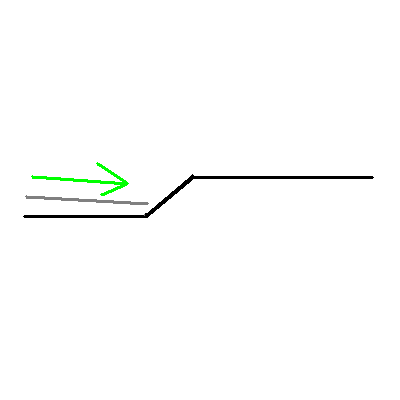
The best way to do this is to come at the hill from the low side and slowly shave off that upper part of the hill.  I usually am just sliding the cutting edge of the blade over the hill repeatedly, shaving off layers until it feels smooth.


Shallow Hill


The result is essentially a gradual hill, that bridges that original height difference.

At this point, we can attack the roughly cut hill with a  file to smooth everything out.  Also, consider emry nail pads from the drug store, in the nail care aisle.  They come in several grits, and at $1 a piece, you can cut them to slender shapes to get into hard areas.


Filing Round parts


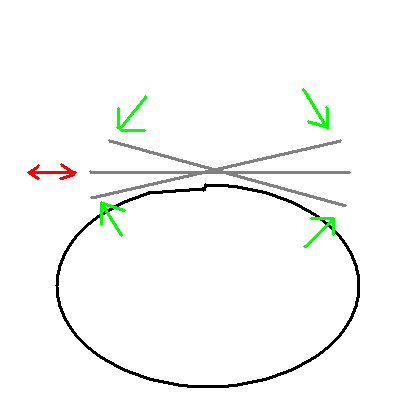
When I use a file, here's what I do.  I typically use an oval or round shaped (profile) file. That way, it contacts the part at only a single point, and won't accidentally flatten something out.

I then tilt the file (grey bar) up and down (green arrows) as I move it back and forth (red arrows).  This keep the file from hitting the same part too long, causing more flat spots.

You can do the same with nail file sticks.


So, now that I've shown how I go about cleaning up stuff, here's some pictures of how the Storm Strider's Lightning Ball cleaned up:


Raw part with a "Mold Shelf" due to mold mis-alignment
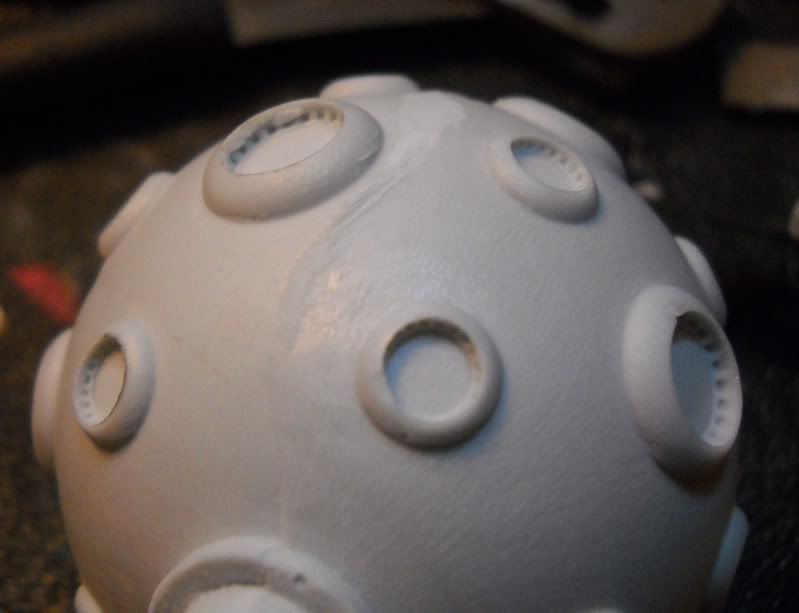
Edge cut off the shelf, this is at the hill stage.
The top most part has been shaved to smooth out the hill.

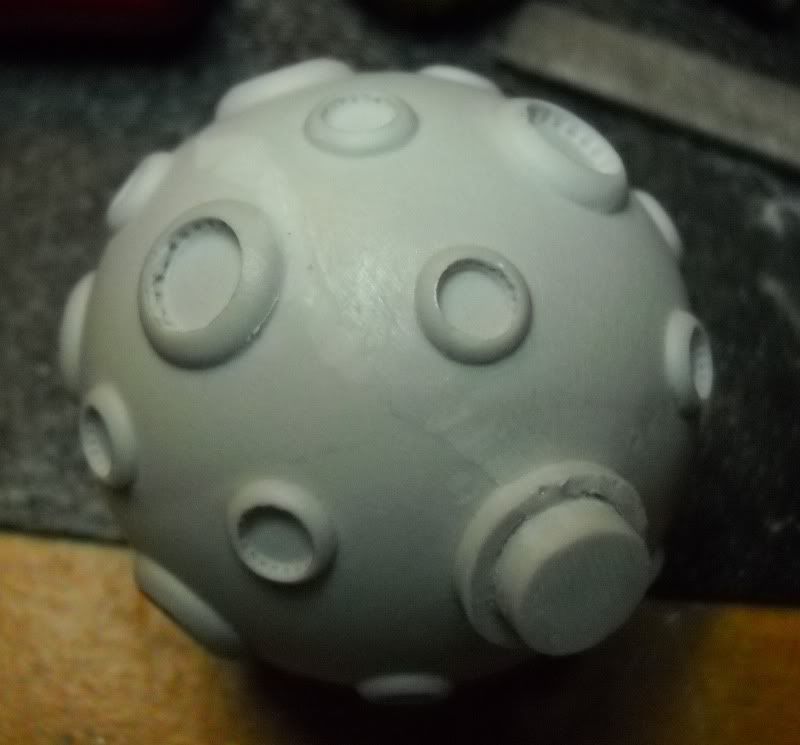
Mold line completely shaved and smoothed with a file.


I then glued on the gantry and pinned the top tower part.  I test fit the ball, and the nodes rubbed on the tower top.  I needed to recess the ball just a hair.  So, I used my hobby knife and cut off that flat ring on the bottom post.  I then cut off half the post, and it sits about 2-3 mm lower now, and nicely clears the top tower.


Here's a picture of the (almost) completely assembled Storm Strider.  I haven't glued down the ball yet, I'm going to leave it loose until I paint it.


I also painted the little raised arc markers on the base in bright blue, just so they're visible while I use the model for the time being until I get it painted.

ZAP!!     ZORTCH!!  

Sunday, July 31, 2011

Skorne Flesh

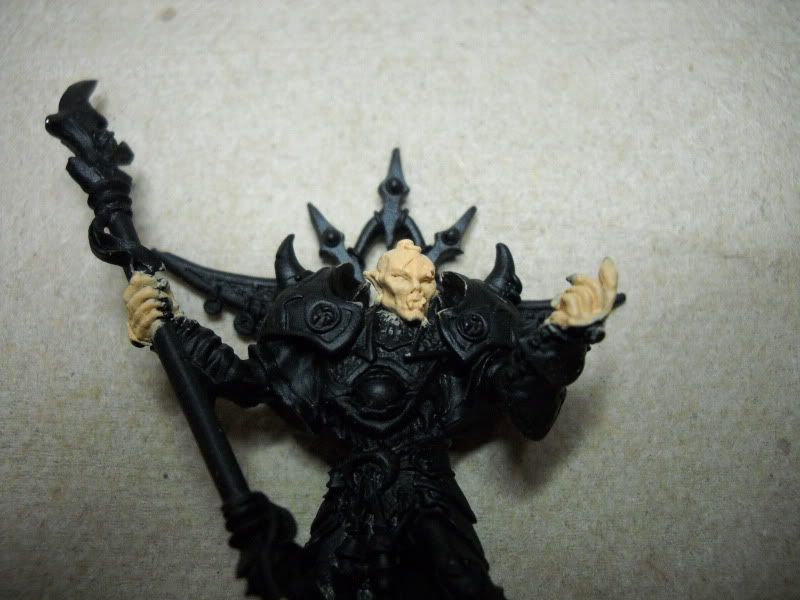
Skorne flesh in the Forces of Hordes: Skorne book has a bluish, almost undead feel to it.  I, of course, had to do something different.  Instead, I went with a paler, fairer skin.  In the background for the Skorne, it's clear that they are an offshoot of the Iosian elves.  They had different religions beliefs and left Ios in order to pursue their own ideals.  They ended up in the far reaches of the desert, surrounded by strange creatures and over time, developed into their current society.

Rather than go the "undead vampire elves" direction that Skorne always gets lumped under, I went the opposite direction.  These folks revere their elders, the ancient warriors, their ancestors.  To me, that means they also take very good care of themselves.  Not because of arrogance or vanity, but so that they are as capable and worthy to carry out their daily tasks.  So, in that regard, I went for a lighter, fairer flesh.  To me, that played off the red and bronze better.  Since they live in the desert, having some dirt and grime in the creases of their skin made sense too.  So, the end result was something very light on the edges, and very dark in the creases.

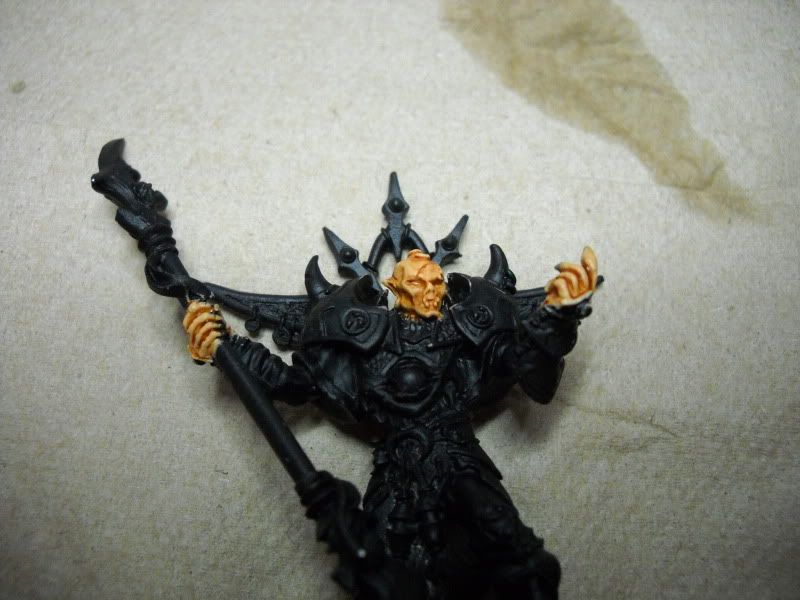
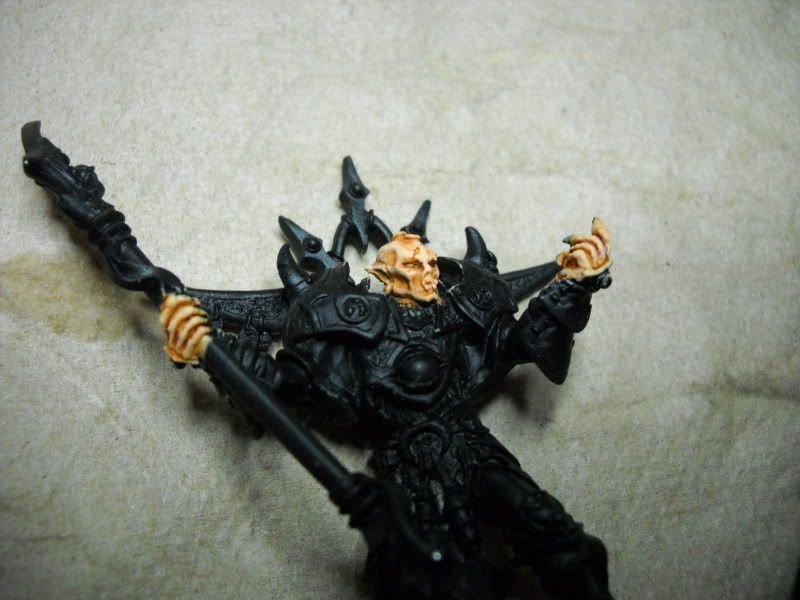
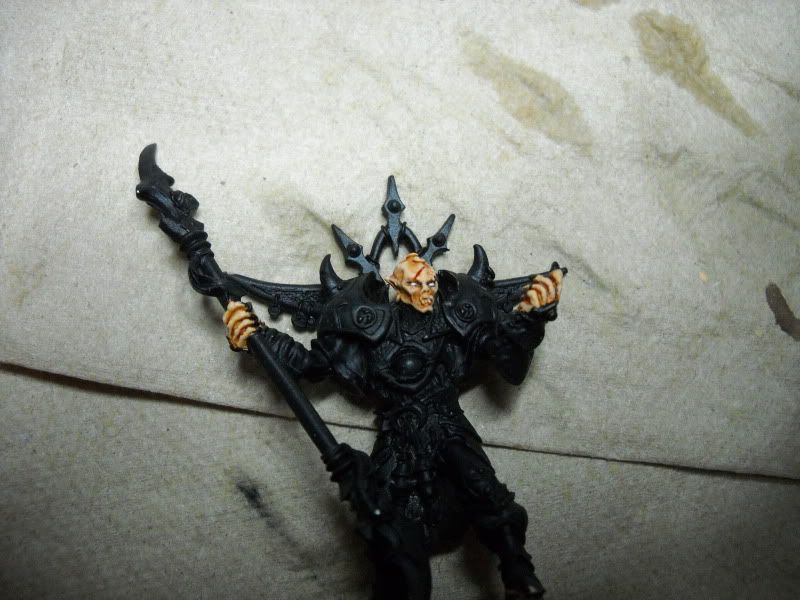
Here's how I do my Skorne Flesh.

  1. Prime Black
  2. Two light coats of Foundation Tallarn Flesh
  3. Two coats of Citadel Elf Flesh
  4. One coat of Citadel Gryphonne Sepia
  5. Drybrush / highlight with Citadel Elf Flesh
  6. Details (White Eyes, red scars, silver piercings)
Step 1 & 2:  Prime Black, then some Tallarn Flesh to set the base tone
Step 3: Two coats of Elf Flesh to get that fair, light skin tone

Step 4: Gryphonne Sepia wash to give us some depth and dirt in the creases
Step 5: Highlight parts of the face with Elf Flesh, the base color
When highlighting the face, I pay special attention to the cheeckbones, jaw line, eyebrows, nose & nose ridge (think Worf from Star Trek) as well as the ears, crown and center head ridge.  Also, hit the top of the upper lip, and the top of the bottom lip.

Step 6: Details
All my Skorne are getting white eyes.  They're creepy desert elves who have no afterlife!  Of course they get creepy eyes!

Also, the scar on Hexeris' head was hit with Citadel's Red Ink, so it looks nice and fresh.  I also blacked out his fingernails, so I can paint them later.

The last step will be to paint all his piercings silver, but I'll do that with the rest of the metallics later.

Tuesday, July 26, 2011

Fixing Drago's Biceps

Studio Drago Model
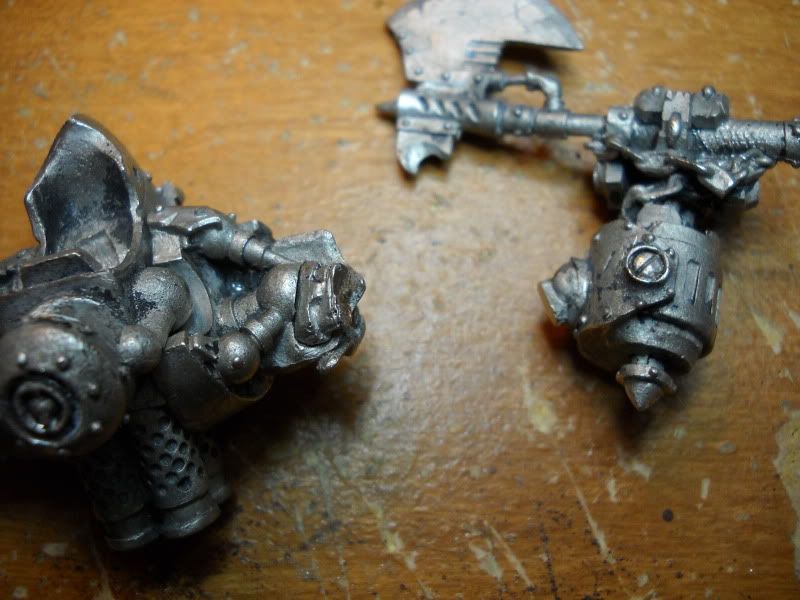
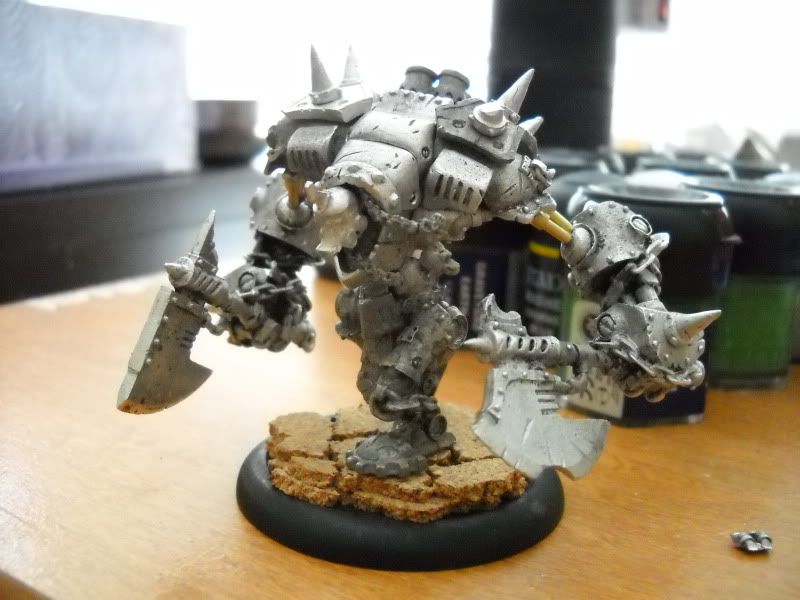
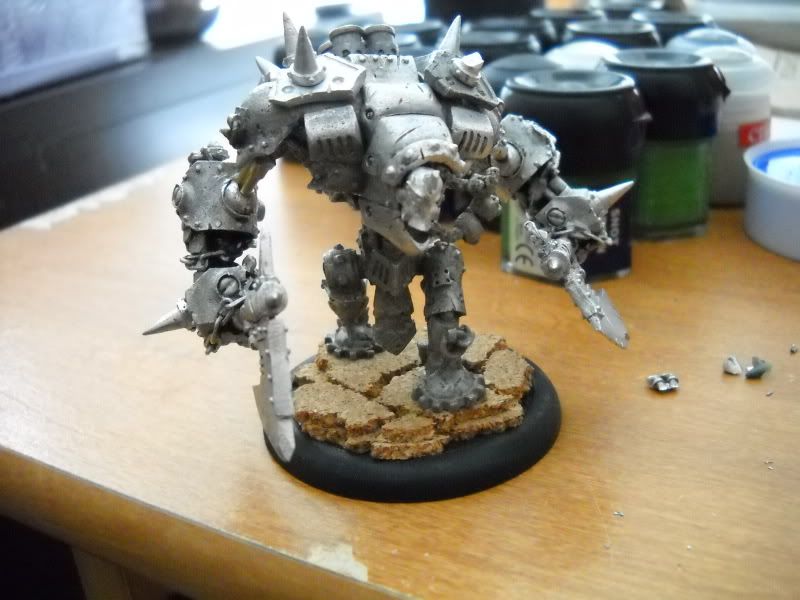
One of the biggest complaints about the awesome model that is Drago, the character Beserker, is that his upper arms are incredibly short and wimpy.  They have to support the massive weight of his arms and axes, and since they stick out from his body, they take lots of wear and tear.

The used Drago model that I got in a trade was no different.  One arm was already broken, and the other was starting to break apart.

So, when I got the itch to convert last week, I knew I wanted to get some Khador rolling, and so I worked on Drago.  Here's what I did:
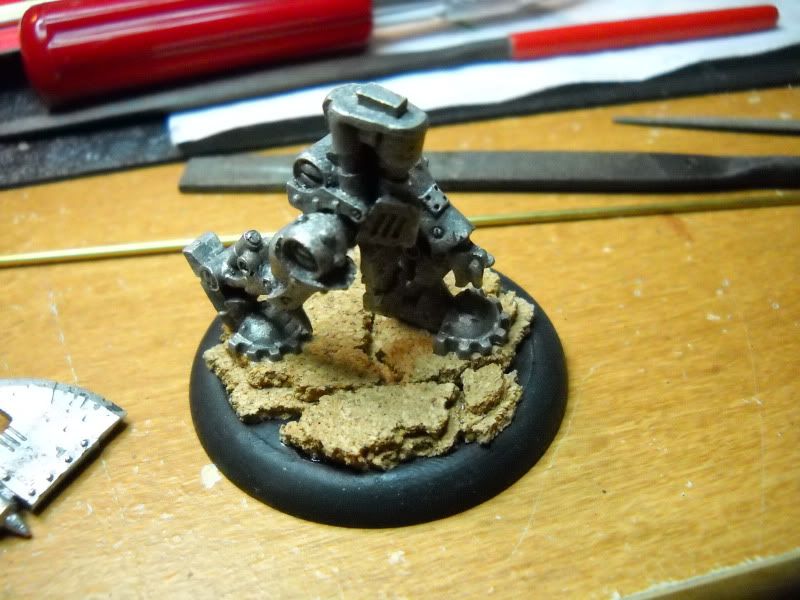
First, I based the model with cork to match my other northern armies, and assembled the legs.  One pin in the back foot, and two in the other.

Since Drago's leaning so far forward, I got the legs as far back as possible.

After that, I assembled the torso - center and shoulders.  I then clipped off the tops of the two arms and glued them into the shoulders.  I also cleaned up the cuts.


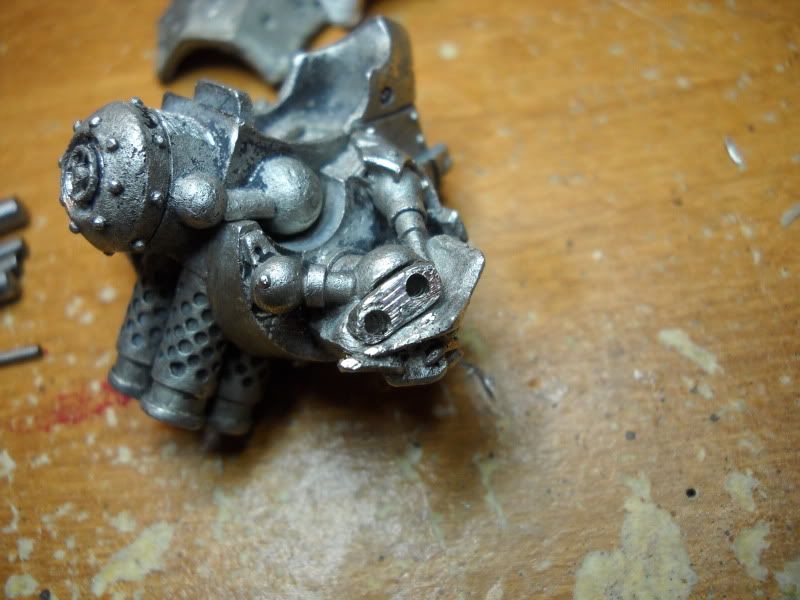
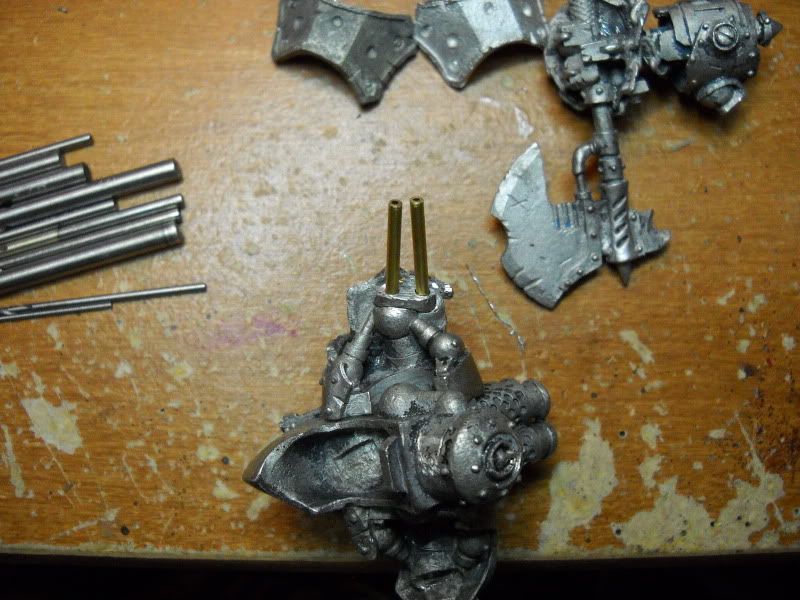
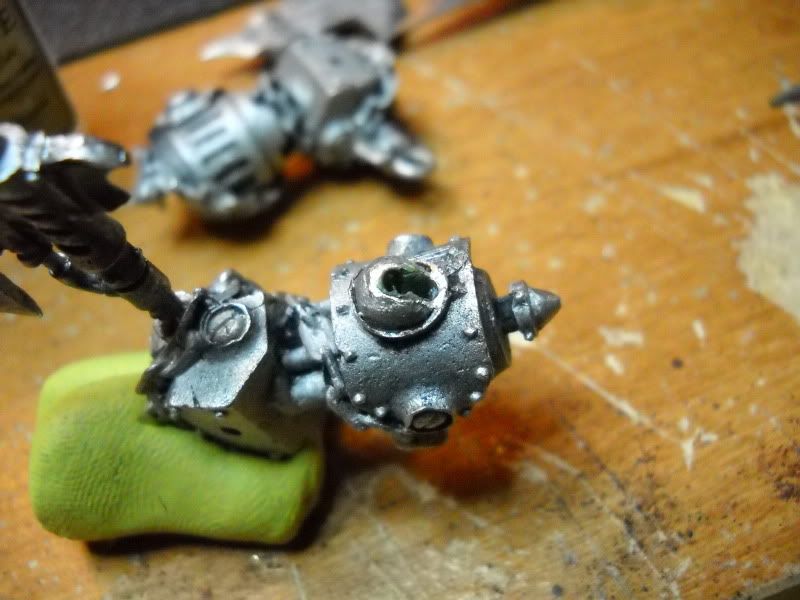
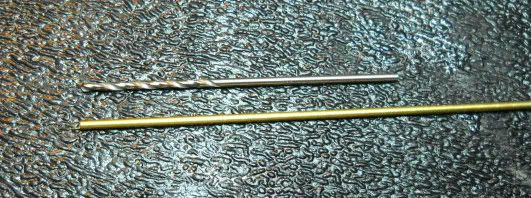
Next, I pressed two points into the shoulder bit with my pick, and drilled two holes.  Unfortunately, the holes were a bit big, and I had to cut off and file more.  I was drilling for 1/16" brass tube, and apparantly, that's the size PP used for the outer parts of the pistons.  I'm adding bulk, so this is good - my tube will be bigger and stronger, which is the entire reason for doing all this!


The holes weren't perfect, but no one will be looking at the model from this angle, so I really don't care.  I've drilled these holes deep.  They go about halfway through the shoulder.

The next step was to test fit some brass tube.  I've cut two sections the same length and dry-fitted them into the holes.


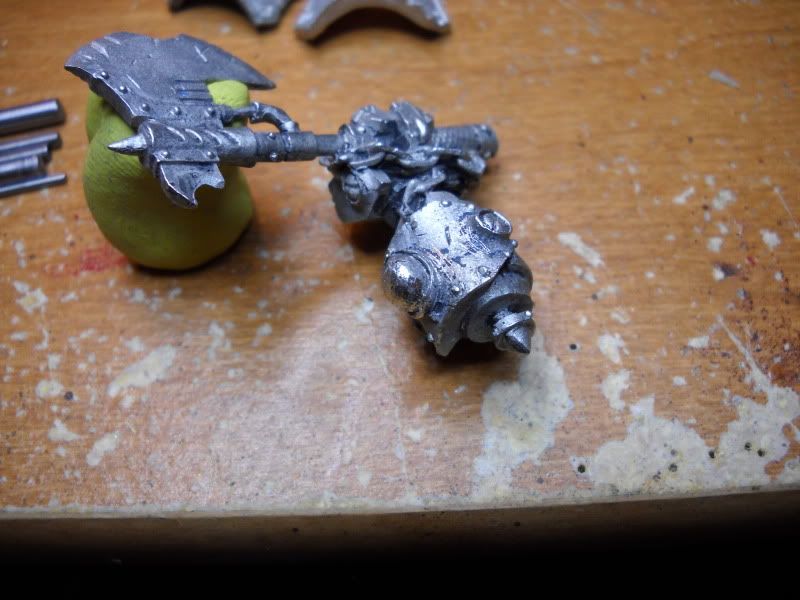
I then cut off the block bit on the arm, leaving just the ball.  I cleaned that up with a file and drilled a pair of holes into the arm.


I then had to use a ball shaped milling bit in my Dremel to deepen and widen the hole inside the arm.   When drilling the second hole into the arm, the bit tends to slip into the previous hole.  When that happens, there isn't enough room in the bottom of the hole for two brass tubes, since the holes converge.  You have to widen the bottom of it so that both tubes can slide all the way down.  During this process, it all became one, giant oblong hole, which is fine.

While I was recharging my Dremel for a bit, I cut some tube of the next larger size, which conveniently slides right over the stuff I'm already using.  These short bits became the outer tube of the pistons I was trying to create.


I also decided that my original tubes were a bit too long (or drilling deeper was too much work) so I shortened them by a hair.  I filled the hole in the arm about halfway with greenstuff, dunked the now glued in place tubes into water and smushed them into the arm.  I held it there for a 10-count and then carefully pulled the tubes free.  


Setting the arm aside, I repeated the process on the other side.  Once the greenstuff was dry, I finished the assembly.


The arms are now rock solid, and if they do break, it'll be far simpler to replace a tube or re-glue than to try and pin those itty-bitty arms he used to have.

Cheers!

Sunday, May 15, 2011

Brass Rod Weapons

Introduction

One of the most common issues with pewter miniatures is bendy weapons.  They're awful!  The shafts the sculptors use were probably brass rods or tube, which is fine, but when that is cast in pewter (or white metal), it just doesn't hold up.  The easiest way to fix this is to spend loads of time trying to carefully bend these weapons back into straightness.  The harder, but better looking option is to cut up the weapon and do as the sculptor did - use a brass rod or tube as a weapon shaft.

That's what this tutorial is about.  It's asked loads of times on the forum, and it really isn't as difficult as some people make it out to be.  Don't get me wrong, it's tedious, painful and repetitive, but the results are most definitely worth it.

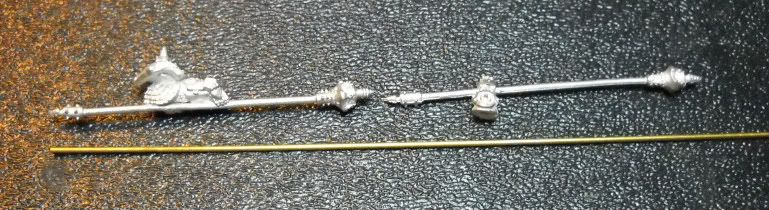
A while ago, I picked up a few Iron Fang Pikemen arms from the PP bits store, so I'd have one or two to ruin before going onto my entire unit.  For this tutorial, I have a standard grunt weapon arm, as well as an officer's arm, which is far more complex than the grunt's.

The first step for me was to take these to work and throw some calipers at them.  I needed to measure the pewter shaft's diameter so I knew what size rod / tube to use.  I measured them to be 1.5mm, or about 0.059 inches.  I decided I'd much rather go smaller with my shaft replacement size since that leaves me more material around the holes I'll have to drill.  I found some 3/64 inch diameter brass tubes by K&S Engineering at Hobby Lobby, which is about 0.046875, or about 30% smaller than the stock size.  Good!


Note:  I chose tube rather than rod, because tube is far more rigid.  Rod is solid, and essentially a wire, which means the only extra rigidity you get is in the material properties.  The tube, however, has structural rigidity as well as being made of a stronger material.  The metal has to rip before the tube will bend, which is not the case with the rod - it'll bend almost as easily as the pewter!  So, the tube is much better.

The Tutorial
The first thing to do is cut a length of brass tube.  Since no tube cutter can handle stuff this small, I had to emulate what a tube cutter does with a knife and table.  Essentially what you need to do is hold the knife on the tube, apply pressure and then roll the tube back and forth under the knife blade.  This will score the tube and then cut through.  


The next step is to cut up the pewter arms.  I cut off the weapon head and counter-weight, and then cut the leftover shaft from the hand.  Here's what's left:


So, now comes the hard part - preparing the pewter bits for the rod.  I used a file to flatten the parts where I cut the pewter.  It's much easier to locate and drill the center of a flat surface.  Once flat, I used a pick to put a dimple into the center of the flat area, and drilled in.

For the hand, I drilled through the pewter rod with a much smaller drill first.  Then, I use that as a pilot hole for the bigger drill.  Once through with the bigger drill (same size as my tube), I trim off any extra pewter (remember, my replacement rods are 30% smaller than the original, so there's a bit left over after drilling).

I had to use a slide clamp to help hold the small bits since my hands are a bit big.  I found that clamping too much actually bent the little rivets on the bit, but too little and the bit slides around and it's annoying.  


Once all the parts are drilled, it's assembly time!


For the officer's arm, the pole doesn't actually go through the hand, so I glued the head and counter-weight on first.  Mainly because then I could position the arm where I wanted.


Here's the two finished weapons:


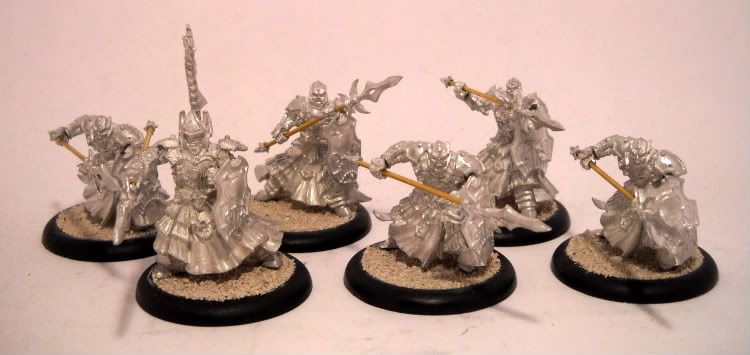
And, using the same technique, I put brass tubes into my full Cataphract Cetratii unit:


Sunday, April 24, 2011

Magnetizing a Cryx Kit

Well, if you're a regular on the PP Forums, you may have seen the Tutorial Finder thread in the Modeling and Painting section.  One of the big hits is the section on how to magnetize the plastic 'jack kits.  However, there's always been a missing tutorial.  One for Cryx 'jacks!

Luckily for me, when I gave away a magnetized kit for celebrating my 100th blog post, the winner (Tha Brotha of Can A Brotha Get A Six) chose Cryx!  This gave me the perfect opportunity to write what you're about to read!

For this kit, I used only one type of magnet: 1/8" diameter x 3/32" thick Grade N42 magnets by KJ Magnetics.  Leftovers from my menoth kit.

So without further adieu, the tut.

First, the unboxing.  This kit contains everything needed to make a Slayer, Reaper or Corrupter.


As you can see, you get one torso, a pair of legs, a pair of shoulders, and for each 'jack, a head and pair of arms.  Pretty standard for these plastic kits.

After cleaning up the mold lines, flash and so forth, I glued on the legs.  They're keyed specifically, so you can't really put them on backwards.

After gluing them on, I pinned the model to the base.  I didn't glue it on though.  I'm not sure what basing will be required, but I wanted to be sure poses would work, and putting the model on the base is the easiest way to make the model stand up.

This was done per my usual method.  Pins deep into the legs, holes into the base, insert and bend.

I started with the heads.  I drilled holes into the back of each head and stuck magnets in, making sure they all had the same polarity.  I followed that up with a hole into the center of the head cavity, again paying close attention to getting the polarity correct.


Now, on to the arms!

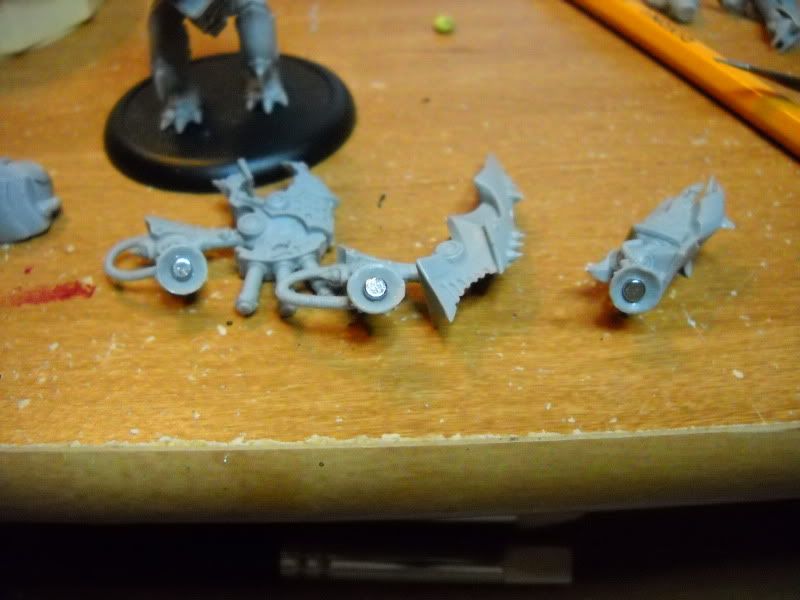
I started with the right arm for no particular reason.  I sticky tacked the shoulder in place about where I liked it and then sticky tacked an arm to the shoulder.  Much like I did on the Menoth 'jack and Khador Battle box, I marked on the shoulder the outline of the joint.

After that, I drilled a hole for a magnet.  I picked a random polarity because this is the first side.  I'll swap polarities for the other side, that way arms can't be accidentally put on the wrong side.

Now, the Cryx 'jack arms have really shallow cuffs - those rings all the 'jacks seem to have where they join to the ball part of the shoulder.  They're too shallow to house an entire magnet.  So, I drilled the shoulder hole deep enough for the magnet to be recessed a bit.  The holes into the arms were then fairly shallow.  Here's what I mean:


You see how the magnet isn't flush with the outer surface of the ball?  That's because I can't make the magnet in the arms flush with the concave surface of the joint.  By allowing the magnet in the arm to protrude a bit into the shoulder, I don't have to order new magnets specifically for this kit.

Now, to get the magnets into the shallow arms, I had to do some slow drilling.  Like usual, I drilled using a small, 0.85mm drill first.  Then I stepped up through 5/64" to 1/8".  At each drill level, I went as deep as I could until I saw the plastic turn white.  This happens when the plastic is stressed, like when a drill bit is about to break through.  By doing this, each magnet in the arms is as deep as possible.


I then rinsed and repeated for the other side, switching polarities so arms can't be put on the wrong side.

Violà!
Slayer

Reaper

Corrupter

Saturday, April 9, 2011

How to: Basic Conversion

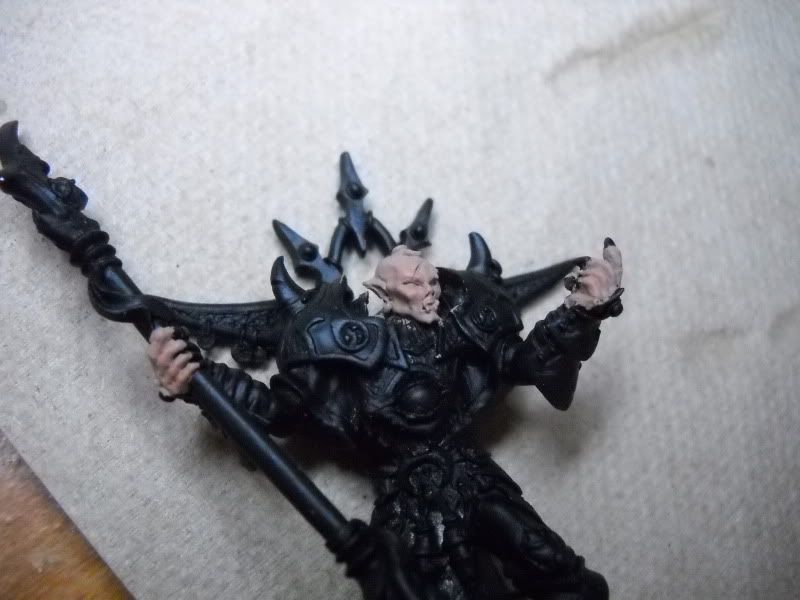
So, I've recently decided I want to try painting some Eldar.  Yes, I know they're a GW product, but they look so damn cool!  One of the auto-includes for almost any Eldar army is a Farseer HQ choice with the Doom spell.  Doom lets any Eldar unit re-roll wound rolls on the targeted enemy unit / model.  Wahoo!  So, I figured a farseer model would be a good, cheap way to try out painting Eldar.

Studio Warlock Model
The problem is, there isn't a Farseer model that has the pose I like.  

What I did find was what are essentially lesser Farseers, called Warlocks.  They're cheaper (points wise), and basically tag along with a unit to protect or guide them.  One of them has the pose I want (and I'll probably buy him just to paint it, because IMO, it's an awesome model).  I love the shooting pose here.  Combined with the mask, it has a sense of stoicism and finality.

I want a Farseer that carries the same feeling!

Thursday, February 17, 2011

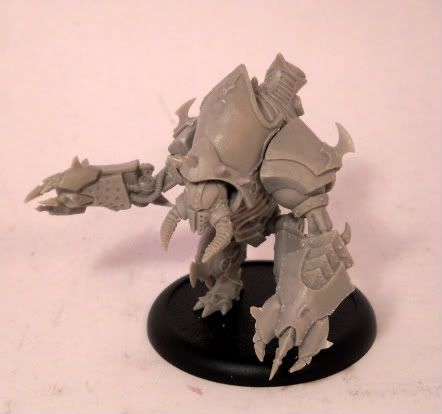
Skorne Titan Gladiator Tutorial

Get a bag of popcorn.  This is gonna be a big one...

First, a look at the parts involved.  Here's all the parts roughly laid out in their places.


Tuesday, February 15, 2011

Skorne Master Tormentor Morghoul Tutorial

Not much of a tutorial for this guy.  He's only three pieces.

Like all my models, I clipped off the tab and filed his feet flat.  One pin into each foot and he's on his base.  The left arm is pretty straight forward.  A pin into the nub and arm and that's done.

I think the tricky part if the right arm, the one that crosses his body.  I put a pin into the flat section of the joint:


Then, I put a hole into the middle of the arm bit, aimed straight down the arm.  They meshed fairly easily.  Really look at the geometry of the joint.  It's a weird one, but once you wrap your head around it, you'll see the best places for the pin.


So far, that's a 3 pt army.  That's a lot of nasty for 3 points!  (Morghoul has 7 warbeast points!)

Up next (and by next I mean tomorrow):  The Titan Gladiator.  It's going to need green stuff.  I'm so excited.


No I'm not.