Showing posts with label Conversion. Show all posts

Wednesday, August 17, 2011

Ironback Scoffer

Following along with the Blacktie Wrastler in the Collective of Genteel Gatorfolk, Faultie has worked up this wonderful character:

Those who cannot do become critics. In the high-society world of the gatorgents, jealous of the acting and combat capacity of the Blackties, the Ironhide spews vitriolic criticism at his enemies, with the capacity to physically kill. Despite his foul demeanor, he is a true patron of the arts, and is never seen without his Playbill and opera glasses.

Faultie has done all mod work to the model itself, however I was charged with manifesting his anger with an Opera Box style railing, which he has ripped apart in his fury.
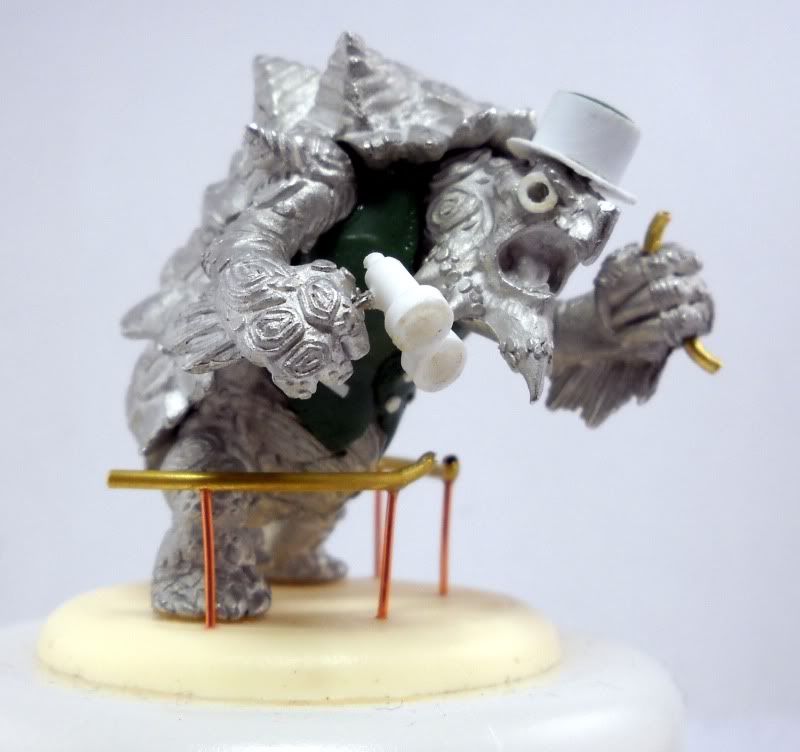
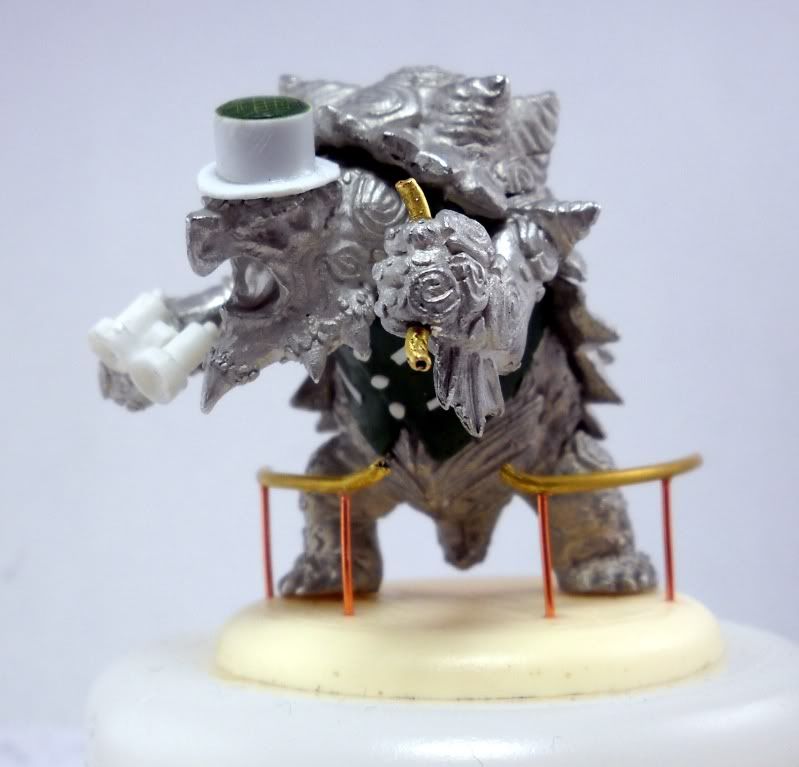

The railing is made from 1/8" (3/64"?) brass tube and 22 GA copper wire.  I bent the tube around my Master's Brush Cleaner top, which has the same diameter as a can of soda.  I then used my fingers and carefully tightened the curve, so that it roughly conformed to the curve of the base.  I then set it back on the base, towards the model's feet, to give the impression that he is leaning over the railing yelling at whomever is unlucky enough to warrant his attention.

I marked four spots on the tube, and drilled four holes.  I then cut four pieces of copper wire and glued them into the holes.  Four holes were drilled into the resin decking base, and the railing glued into place.
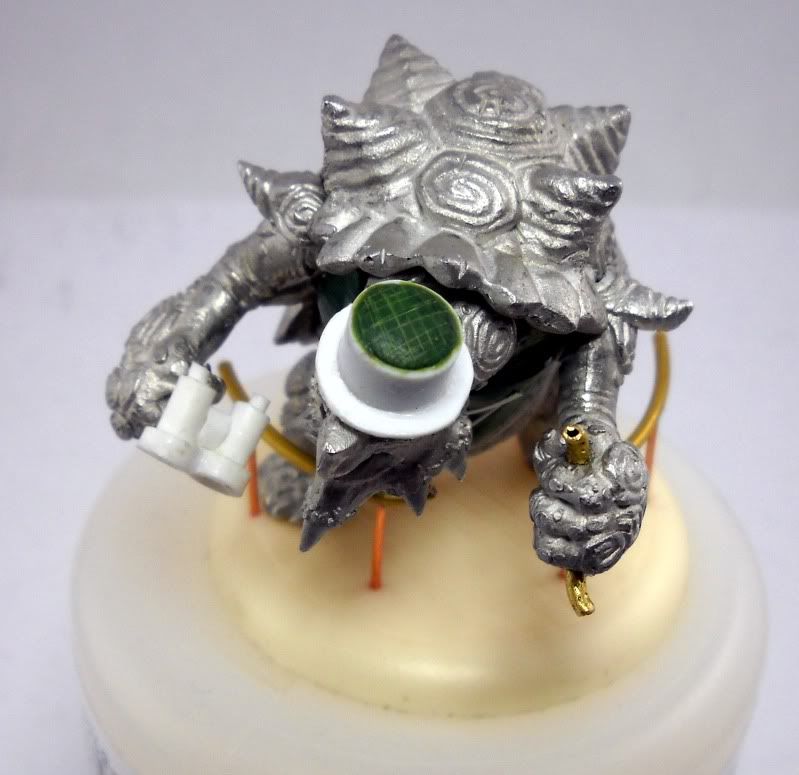


At this point, I pulled the model off the base (since Faultie will likely paint them separately) and used my jeweler's saw to cut out a section roughly the same size as the model's fist.  I used a super small pair of channel-lock pliers to warp the tube so it looked like it has been bent prior to being ripped apart.

A pair of pins went into the model's fist, so that the tube bits would have something to hold on to.  I then too the chunk of tube I had removed, beat up the ends and then chopped off the bent up ends.  After cleaning the hole in the tube with a drill bit (so it would fit over the pins) the two tube bits were glued onto each side of the fist, giving the illusion that the broken part of the railing is crushed in his grip.
I think Faultie's modifications came out splendidly, and I'm very happy I was able to contribute something to this awesome, unique model.  Look for it completely painted in the next Clash of the Titans entry on Lost Hemisphere!

Monday, August 15, 2011

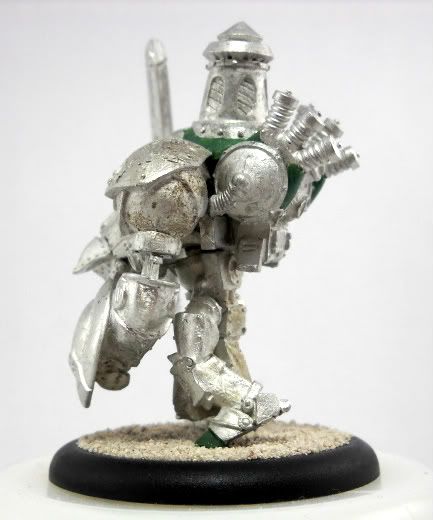
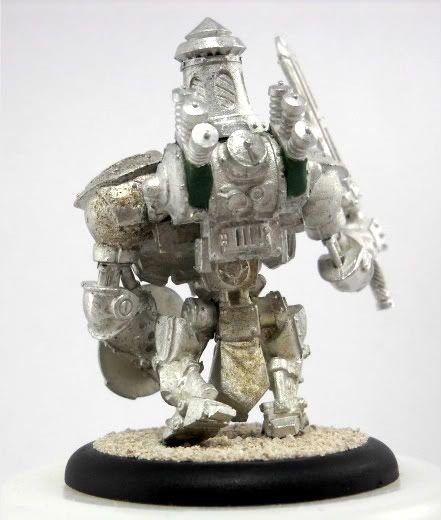
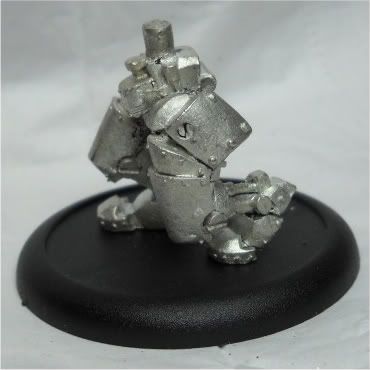
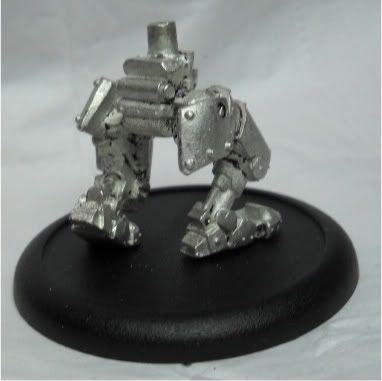
Stormclad Conversion

I hate the Stormclad's banner.  It's huge, obnoxious, and a pain to pack the model with it attached.  It also doesn't really adhere to the rest of the lightning themed models in the faction.

I decided to fix that.


The conversion itself was fairly simple.  I started with the legs (as I always do).  The stock pose is fairly static - both legs are straight, and there's no sense of movement at all.  I sliced the left one off at the hip, cut off the toes and re-assembled the leg angled back some.  The legs were then pinned to the base, and I sculpted new toes (which were really just a very small wedge).

Next, I cut off the smoke stacks, and flattened the nubs they are on.  The large coil is from the Thunderhead kit, as are the small coils (from his hands).  The large coil has a little plate on the back, and is upturned on the opposite edge.  The upturned edge mates with the top of the chassis fairly nicely, and the little plate on the back rests just above the release valve on the boiler.  I simply used a big blob of green stuff to give the coil something to sit on, and help it meld with the rest of the model.

The small coils are from the fists of the Thunderhead, and they simply got glued onto the boiler.  I used green stuff to make them look a little more integrated, rather than just slapped on.

Lastly, the head was pinned on, and the pin was left long enough for me to angle the head a bit.  Another blob of green stuff supports the head, I didn't want to leave it entirely to the pin.


Saturday, April 9, 2011

How to: Basic Conversion

So, I've recently decided I want to try painting some Eldar.  Yes, I know they're a GW product, but they look so damn cool!  One of the auto-includes for almost any Eldar army is a Farseer HQ choice with the Doom spell.  Doom lets any Eldar unit re-roll wound rolls on the targeted enemy unit / model.  Wahoo!  So, I figured a farseer model would be a good, cheap way to try out painting Eldar.

Studio Warlock Model
The problem is, there isn't a Farseer model that has the pose I like.  

What I did find was what are essentially lesser Farseers, called Warlocks.  They're cheaper (points wise), and basically tag along with a unit to protect or guide them.  One of them has the pose I want (and I'll probably buy him just to paint it, because IMO, it's an awesome model).  I love the shooting pose here.  Combined with the mask, it has a sense of stoicism and finality.

I want a Farseer that carries the same feeling!

Saturday, April 2, 2011

Wrastler Repose

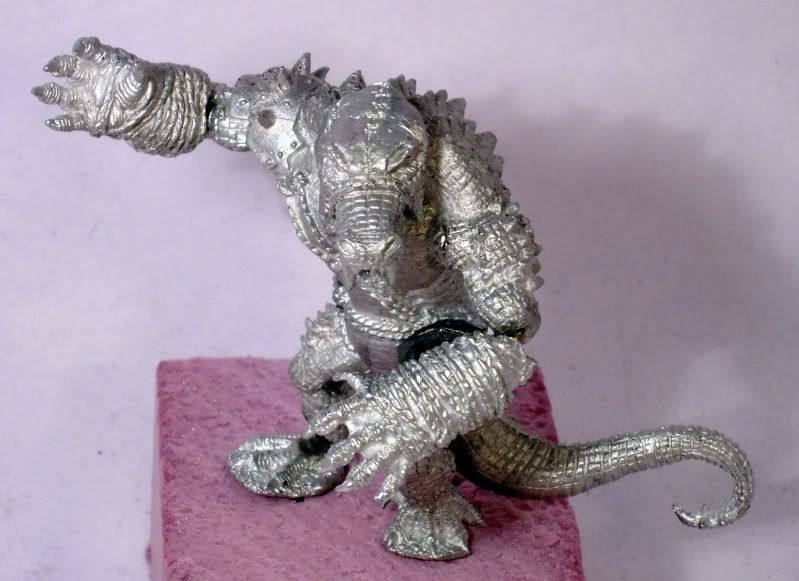
So, as some of you may no by now, one of my side projects is to help Faultie with his Collective of Genteel Gatorfolk.  One of the first things on the to-do list was a repose of the Blackhide Wrastler.  The best part about this particular repose was that there was already a tutorial on how to do it.  Gentleben, of BelloflostSouls.net wrote about how he did a repose for his Blackhide Wrastler back in November.

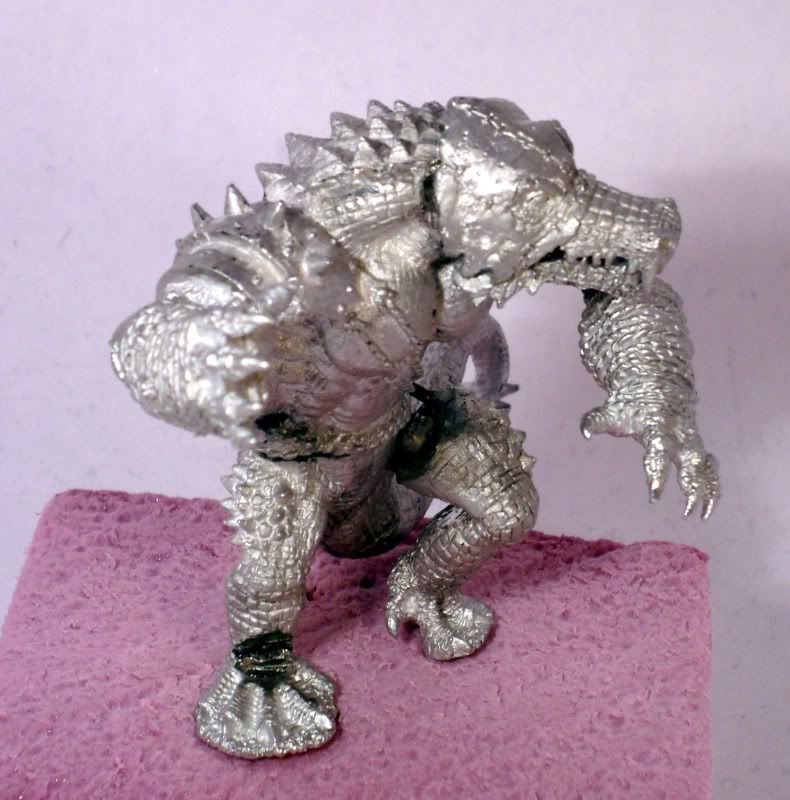
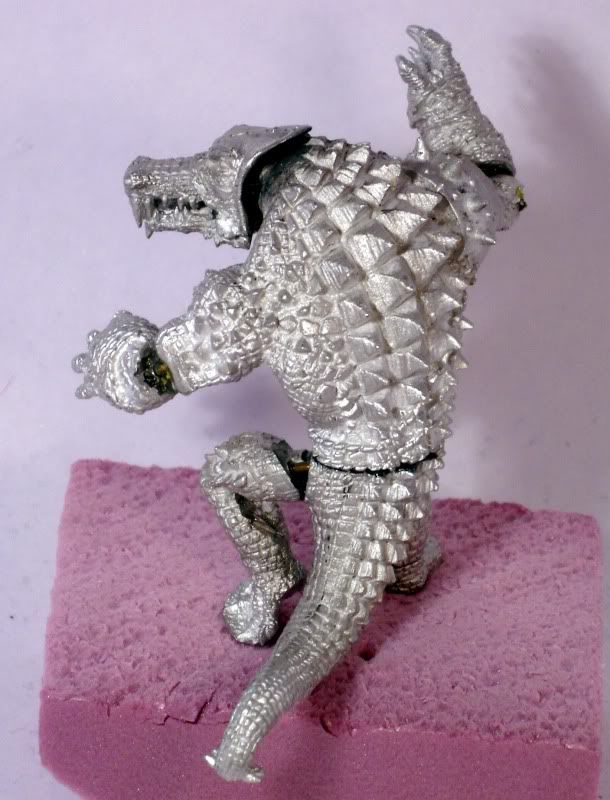
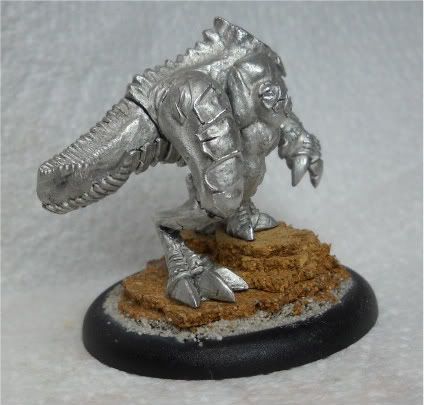
So with that article in mind, here's what I came up with:


You may note that it's not exactly the same as Gentleben's.  A few modifications were made so that it can be further converted to better represent what a proper Genteel Gatorfolk would look like.

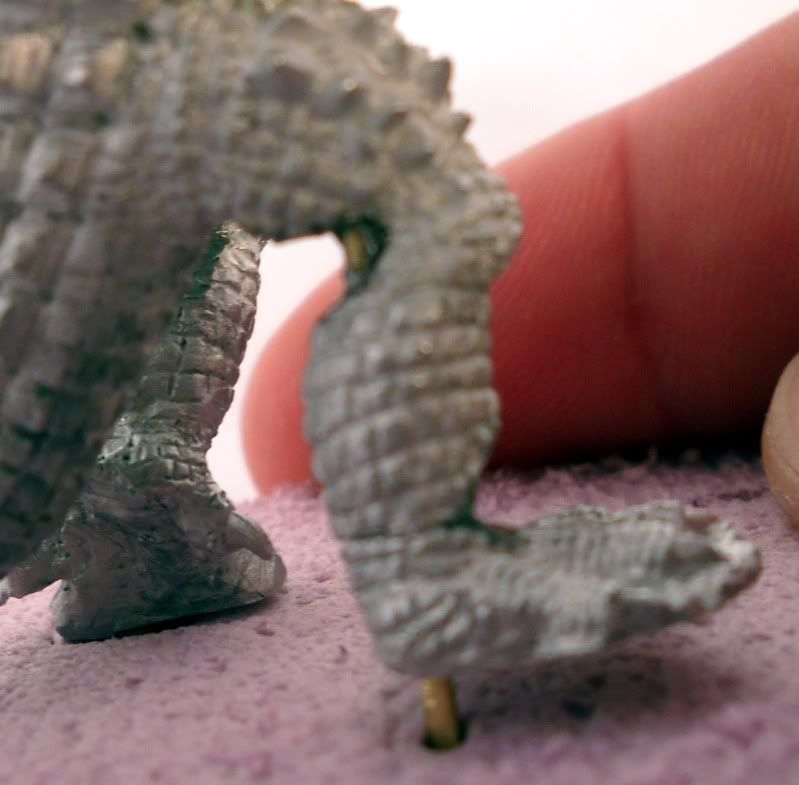
First, I re-used the bottom jaw.  Gentleben gave his a completely new one out of greenstuff.  After a few minutes of playing with the head pieces, I noticed that the bottom jaw fits inside the teeth of the top jaw rather nicely.  A pin and some glue later, and it looks pretty good.  The top two pictures show how well the pieces fit.  No modifications were done to the pieces to get them that way.  I did have to file down the back where it attaches to the head, but that'll get covered up with greenstuff, so it didn't have to be pretty.

Just like in the tutorial, the legs were modified to raise the body up.  The ankle and knee of the model's right leg were cut, and the knee of the left leg was cut too.  Here's detailed shots:


I first cut into the ankle joint.  I went about halfway in.  I then went and cut the knee joint.  The scales and muscles give you a very clear line to cut on.  It was fairly obvious when to stop.  I then wedged my hobby knife in each cut and wiggled it around a but to pry stuff apart.  It was too scary though - I felt like the blade would snap and go everywhere.  So, I pulled out a set of pliers, and started working the joints.

After getting the right leg where I thought it should be, I cut into the left leg.  This was a long cut - you can see where the leg looks too thin.  I'll have to rebuild the calf and thigh muscle with greenstuff.


This leg was awful.  It was so hard to bend.  I had to use a small screwdriver and wedge it into the cut.  By twisting it, I was able to open it bit by bit.  At one point it slipped and the sharp bits on the thigh and the toe nails cut my thumb and finger.  &#*&^ thing drew blood.

Once I had both legs opened up, I put pins in and began testing to be sure the flat parts on the bottom of the feet would line up.  Thus the foam block you see under the miniature.  If you look back at the right leg, you can see that the pin goes all the way up through the foot, calf and into the thigh.  These joints were weak because they were thin and I wanted to be sure it would hold up.  A big brass rod helps.

From there it was much simpler.

The right arm comes in two pieces, joining at the elbow.  I just shaved the top and bottom of the arm part and then pinned the forearm at the right angle.  Again, greenstuff will make the join smooth.  The left arm is all one piece, so I had to cut it in order to change it.  I hacked it apart at the elbow and then pinned it back where I wanted it.

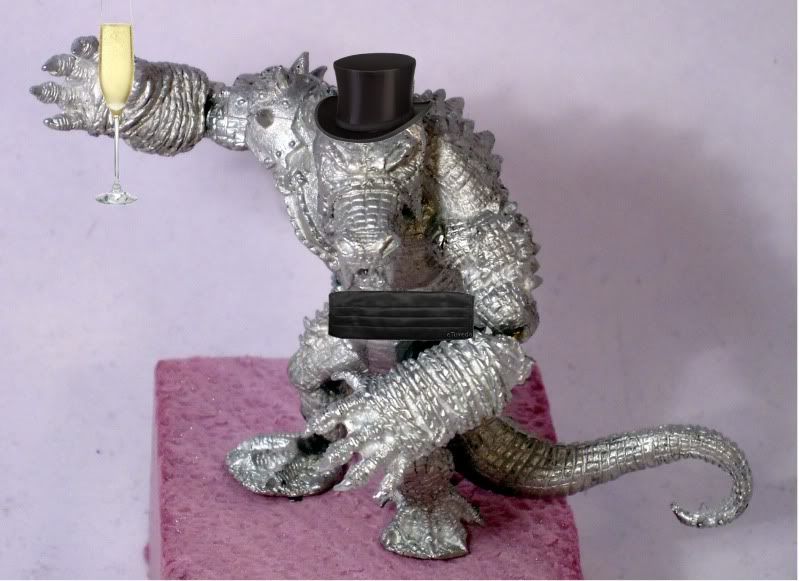
So, the next step is to greenstuff all the gaps and make it look like a gatormans.  Then we'll add the fun stuff.  Here's a concept artist rendering.  The artist may or may not have been sober.

A top hat, cummerbund and glass of chapagne...  Why yes!

Monday, February 21, 2011

Retribution Chimera

The Retribution Chimera is a fairly typical Scyrah warjack.  It moves half a foot, is nearly as hard to hit as a barn, and doesn't have the greatest armor.  It does, however, have the standard Retribution magical shield, and oh... it's an Arcnode!  But wait...  it doesn't have a shield and spear like every other arcnode.  It instead has these stubby wrist ... blades... of doom?  OF DOOM!

The stock model is to the right.  It looks like it's about to ...
  • drop a deuce
  • give someone a hug
  • do jumping jacks
No matter what it's about to do, I don't want any part of it.

So, I hacked mine to bits.

Update, Feb 21

Well, after all that assembly goodness, I took a much needed break and spent the weekend with my wife.  We hit a local historical site, drove around and went shopping a bit and then spent Sunday starting to unpack all our stuff in the new condo.  Sleeping in has never felt better!

Model wise, I've built two more Skorne models: a Cyclops Brute and a Razorwurm.  Yes, the one piece Razorwurm has pins.  Two of them, holding him to his base.  The Brute's shield feels small on him.  I may see about picking up a Karax shield bit and doing something to give the Brute more of a tower shield or something.  Right now it just feels small for his tall, lean body.

I also stripped some Retribution models.  Kaelyssa, Griffon and Gorgon and a Ghost Sniper all went into my Super Clean, and are now in Acetone.  The Chimera I have was NIB, so I've cleaned up its mold lines (ugh) and  started re-working the pose.  He's a super-fast arcnode, so he'll look it.

The To Do list:
Strip pVlad, Drago and Beserker

Base and assemble the Cygnar Hunter
Base and re-assemble my Striders + UA (so they can be painted soon).

Get some Instant Mold for making extra sets of Myrmidon hands (so I don't have to magnetize the things).

Prime my Khador and Skorne models.
Paint a Forsaken (to polish off a basic 15pt Legion Battle Box army).

Paint a TRAINBOAT test model:


I snagged a blister of 6 frigates for $10 from the LGS the other day, and they are awesome.  I'm very excited to paint up some of these!
I'll likely get a Battleship next.

Paint a Directorate test model:


I have the starter fleet pictured here.  I'm not going to do green, but was thinking instead of blue.
I also like the idea of trimming the flight stand so models are at varying heights.  Really plays on the 3D-ness of space battles!

Anyway, that's the plan for now.  I've got a few things to assemble, and then all the conversion tools go away for a bit and all the painting stuff comes out.

Retribution WIP pics tonight or tomorrow!!

Monday, January 17, 2011

Long Weekend, Long Post

I had today off because it's MLK, Jr. day, and I enjoyed a long day of WoW and painting.  Let me start at the beginning.

Saturday, my wife and I got up, got in the car and headed to Baltimore for the tournament.  I dropped her off at a history museum in town, then headed out to Glen Burnie.  I got there, got to the store and realized everyone was playing Warhammer Fantasy.  I pulled out my hand dandy Blackberry to find out that I was off by a day.  My tournament was tomorrow.  My language was colorful, to say the least.


It wasn't all bad though.  The store did have Old Witch & Scrapjack who I have been having a hard time finding on Bartertown.com.  They also had superglue.  Yay!

The trip wasn't a total loss.  I'm also very happy to have Old Witch & Scrapjack.  I have a list that I've been playing with on the forum that is fairly solid with Irusk, Strakov and Old Witch, so that's a pretty nice variety with only caster swaps.


Grr...


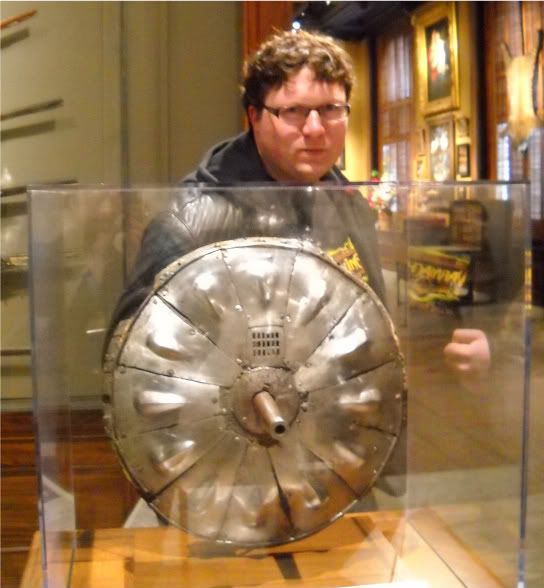
So, I called my wife, admitted my mistake and we toured the history museum for about an hour.  They had a cool armory, and I took a picture with this shield gun.  

I felt like a Man-o-War Shocktrooper!  The plaque said the things were difficult to aim since it was too heavy.  Not very practical.  Hopefully the Man-o-Wars are better trained than the guys that used these.


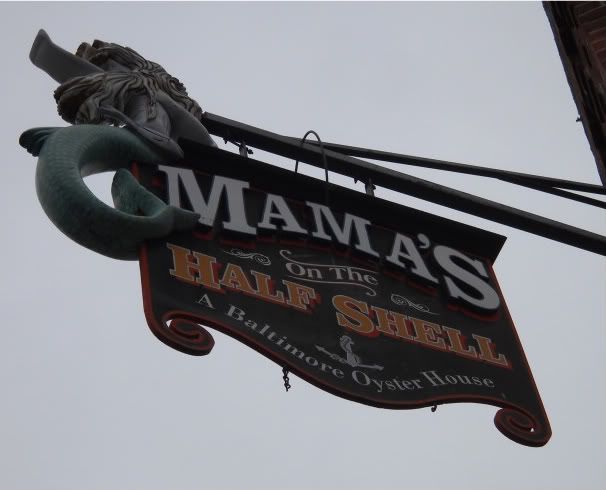
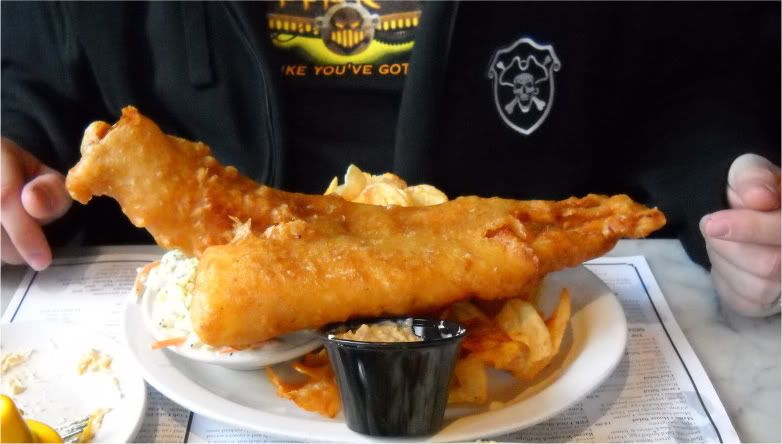
After the museum, we stopped by Mama's on the Half Shell, and I had the largest Fish'n'Chips, I've ever had:


Yes, it's as long as my torso is wide...


Sunday, I worked more on Karchev.  I built a rear bumper looking apparatus out of wire:

Do you suppose he beeps when he backs up?

I then clad this in plasticard and mocked up a skirt type deal with sticky-tak.  I'm trying to capture the movement as he's running forward.  The bottom part should be swinging towards the rear foot as the top starts to swing towards the forward foot as his hips are in the process of rotating the other direction.  The yellow doesn't show it terribly well, but here's the WIP shot I took:


I'm thinking when it's greenstuff and I add holes and tatters, it'll look much better.  If it looks terrible, we'll call it a prototype and try again.

Lastly, I got my Legion for the Online Gamer's Journal primed, and I've basecoated the skin with GW's Codex Grey:

Rawr!
Yay!  Busy weekend, and a short week, since this week is our scheduled Friday off.  w00t.


Sunday, January 16, 2011

Kerchev WIP 1

So, while I wait for my Legion primer coat to cure, I'm working on Karchev.  I got the model as a conversion.  I have all of his upper half, but the legs from a Devaatator were used, and there was no skirt for him.  So...

Devastator legs are very static.  I want Karchev to be very dynamic.  Thus, something had to be done!  The following cut was made with my jeweler's saw (after the tab was removed):


This allowed me to rotate the left leg back into a "pushing off the ground" pose.  With the other one firmly planted, he'll look like he's lumbering forward.  I also cut a little into the left foot.  Just enough to 'score' the line between toes and foot.  That let me bend up his toes.  Here's the result with the new left leg pinned to the body (but not yet glued)


So far, so good!  Now, to scratch build a skirt!

Saturday, January 15, 2011

Carnivean Conversion Done

So, I was so stoked about this project, I just kept on going.


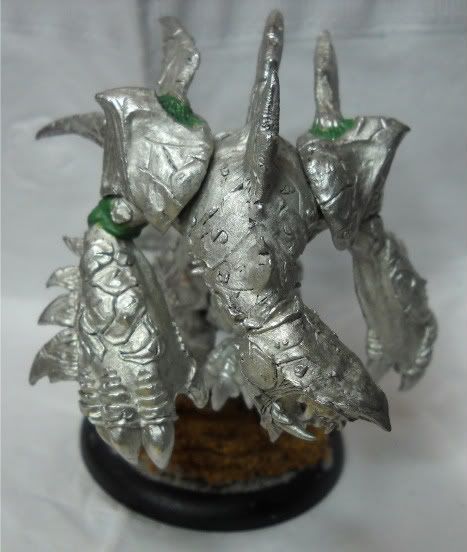
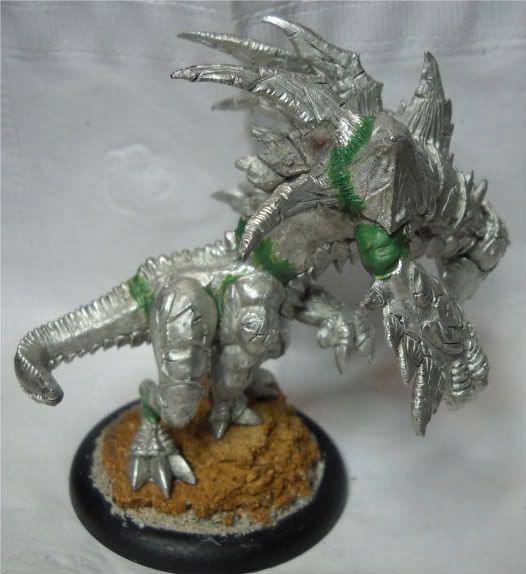
It's subtle, but sometimes the simplest conversions look the best.  I hope this falls into that category.  I went back to an original forearm.  There was too much work involved for not enough gain.  Besides, with a completely changed flipper, no one will be looking at the forearms anyway.  In my opinion, he looks as if he's in mid stride, looking for a target.


So you can see all the alterations were done on one side.  The rear leg was extended just a bit, looking like it's pushing off the ground, and the arm on the same side bent roughly 45 degrees forward and about 20 degrees in ward, adding a forward swing motion.

The greenstuff on the arm looks bumpy, but I assure you, it's sculpted to look like folds of skin.  Hopefully it'll look good when painted.

Him and the rest of the OGJ crew will get paint tomorrow.  I'll be doing double duty by attempting to write a spray painting tutorial while I prime them.  In mid-winter.  In an apartment building.  I'm still not sure how I'll pull this off.

Wish me luck at the tournament tomorrow!

Friday, January 14, 2011

Carnivean Conversion, WIP 1

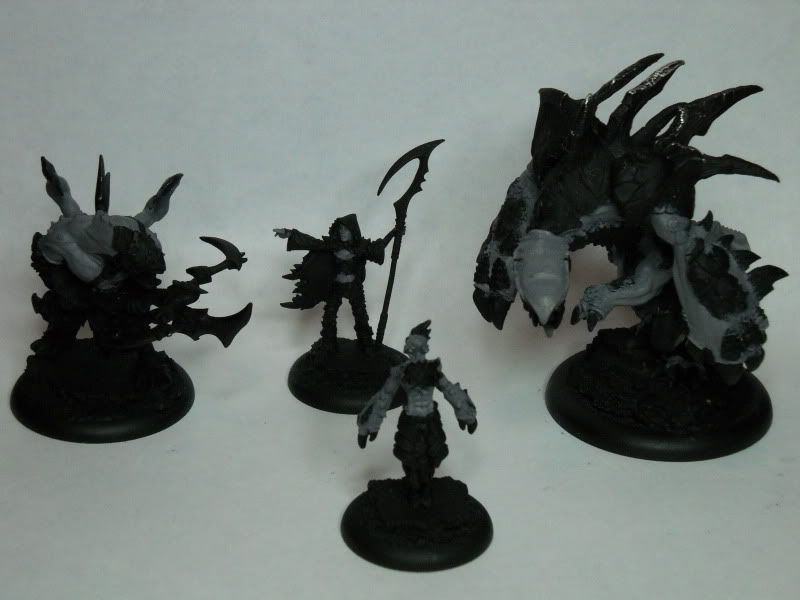
So, for the Online Gamer's Journal, I need to have the following list painted by Jan 31st.

Points: 15
Lylyth, Herald of Everblight (*6pts)
* Nephilim Bolttrower (6pts)
* Shredder (2pts)
* Carnivean (11pts)
Blighted Nyss Shepherd (1pts)
1 Spell martyr (1pts)


I'm sort of cheating by having Lylyth and a Shredder done.  I also have a Carnivean, but that's TOO cheating.  So, I'm painting up my second one.  I'm incapable of having two beasts with the same pose, so out comes the conversion tools.  This time, I have a new weapon in my arsenal.  The Jeweler's Saw!

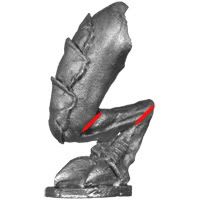
Here's what I did.  I made these cuts (in red) on two of the arms that attach to the lower torso.


I then pulled the big leg so that it's more extended.  The forearm got bent so that it's a bit straighter.  Here's how it sits now.  I'm not entirely sure if I like the forearm.  Good thing I have an extra I can fool with!


What do you think?