

Tuesday, April 26, 2011
Slow Progress is Slow
Well, I haven't gotten quite as much done in April as I'd hoped. Such is life, eh?

Sunday, April 24, 2011
Magnetizing a Cryx Kit
Well, if you're a regular on the PP Forums, you may have seen the Tutorial Finder thread in the Modeling and Painting section. One of the big hits is the section on how to magnetize the plastic 'jack kits. However, there's always been a missing tutorial. One for Cryx 'jacks!


Luckily for me, when I gave away a magnetized kit for celebrating my 100th blog post, the winner (Tha Brotha of Can A Brotha Get A Six) chose Cryx! This gave me the perfect opportunity to write what you're about to read!
For this kit, I used only one type of magnet: 1/8" diameter x 3/32" thick Grade N42 magnets by KJ Magnetics. Leftovers from my menoth kit.
For this kit, I used only one type of magnet: 1/8" diameter x 3/32" thick Grade N42 magnets by KJ Magnetics. Leftovers from my menoth kit.
So without further adieu, the tut.
As you can see, you get one torso, a pair of legs, a pair of shoulders, and for each 'jack, a head and pair of arms. Pretty standard for these plastic kits.
After cleaning up the mold lines, flash and so forth, I glued on the legs. They're keyed specifically, so you can't really put them on backwards.
After gluing them on, I pinned the model to the base. I didn't glue it on though. I'm not sure what basing will be required, but I wanted to be sure poses would work, and putting the model on the base is the easiest way to make the model stand up.
This was done per my usual method. Pins deep into the legs, holes into the base, insert and bend.
I started with the heads. I drilled holes into the back of each head and stuck magnets in, making sure they all had the same polarity. I followed that up with a hole into the center of the head cavity, again paying close attention to getting the polarity correct.

Now, on to the arms!
 I started with the right arm for no particular reason. I sticky tacked the shoulder in place about where I liked it and then sticky tacked an arm to the shoulder. Much like I did on the Menoth 'jack and Khador Battle box, I marked on the shoulder the outline of the joint.
After that, I drilled a hole for a magnet. I picked a random polarity because this is the first side. I'll swap polarities for the other side, that way arms can't be accidentally put on the wrong side.
Now, the Cryx 'jack arms have really shallow cuffs - those rings all the 'jacks seem to have where they join to the ball part of the shoulder. They're too shallow to house an entire magnet. So, I drilled the shoulder hole deep enough for the magnet to be recessed a bit. The holes into the arms were then fairly shallow. Here's what I mean:

You see how the magnet isn't flush with the outer surface of the ball? That's because I can't make the magnet in the arms flush with the concave surface of the joint. By allowing the magnet in the arm to protrude a bit into the shoulder, I don't have to order new magnets specifically for this kit.
Now, to get the magnets into the shallow arms, I had to do some slow drilling. Like usual, I drilled using a small, 0.85mm drill first. Then I stepped up through 5/64" to 1/8". At each drill level, I went as deep as I could until I saw the plastic turn white. This happens when the plastic is stressed, like when a drill bit is about to break through. By doing this, each magnet in the arms is as deep as possible.
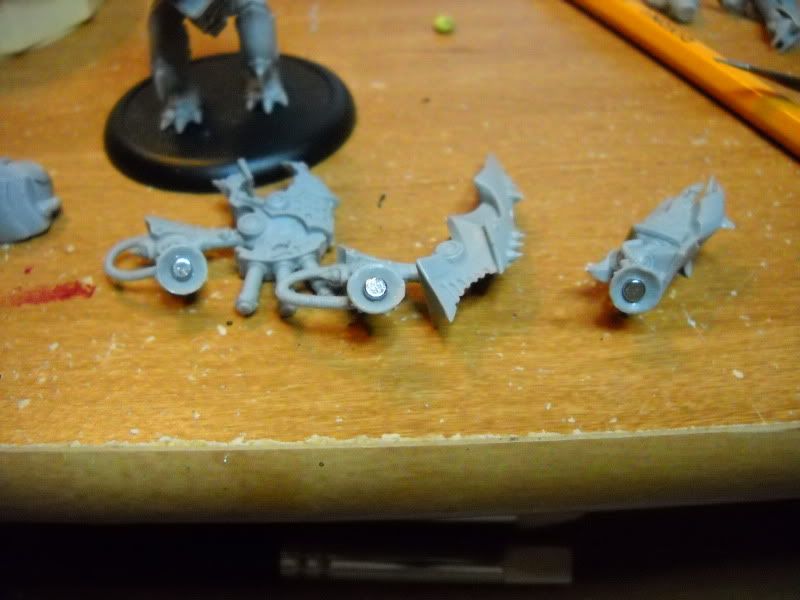
I then rinsed and repeated for the other side, switching polarities so arms can't be put on the wrong side.
Violà!
This was done per my usual method. Pins deep into the legs, holes into the base, insert and bend.
I started with the heads. I drilled holes into the back of each head and stuck magnets in, making sure they all had the same polarity. I followed that up with a hole into the center of the head cavity, again paying close attention to getting the polarity correct.
Now, on to the arms!
I started with the right arm for no particular reason. I sticky tacked the shoulder in place about where I liked it and then sticky tacked an arm to the shoulder. Much like I did on the Menoth 'jack and Khador Battle box, I marked on the shoulder the outline of the joint.After that, I drilled a hole for a magnet. I picked a random polarity because this is the first side. I'll swap polarities for the other side, that way arms can't be accidentally put on the wrong side.
Now, the Cryx 'jack arms have really shallow cuffs - those rings all the 'jacks seem to have where they join to the ball part of the shoulder. They're too shallow to house an entire magnet. So, I drilled the shoulder hole deep enough for the magnet to be recessed a bit. The holes into the arms were then fairly shallow. Here's what I mean:
You see how the magnet isn't flush with the outer surface of the ball? That's because I can't make the magnet in the arms flush with the concave surface of the joint. By allowing the magnet in the arm to protrude a bit into the shoulder, I don't have to order new magnets specifically for this kit.
Now, to get the magnets into the shallow arms, I had to do some slow drilling. Like usual, I drilled using a small, 0.85mm drill first. Then I stepped up through 5/64" to 1/8". At each drill level, I went as deep as I could until I saw the plastic turn white. This happens when the plastic is stressed, like when a drill bit is about to break through. By doing this, each magnet in the arms is as deep as possible.
I then rinsed and repeated for the other side, switching polarities so arms can't be put on the wrong side.
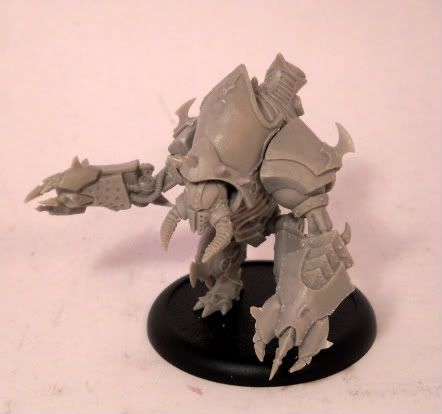
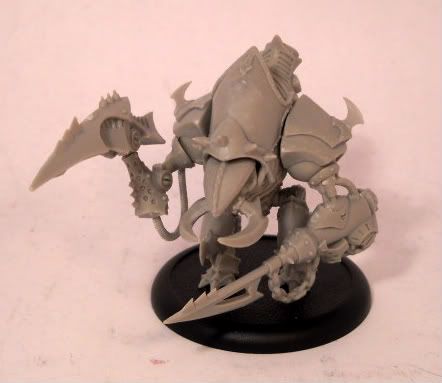
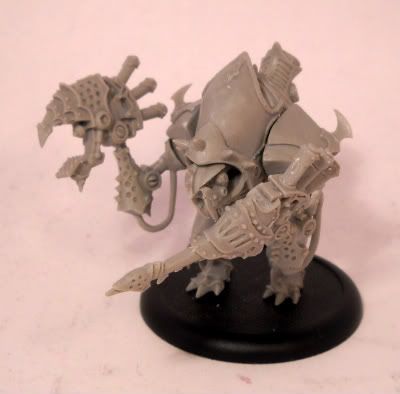
Violà!
|
| ||||
| |||||
Tuesday, April 19, 2011
Gatorfolk update!
Progress!
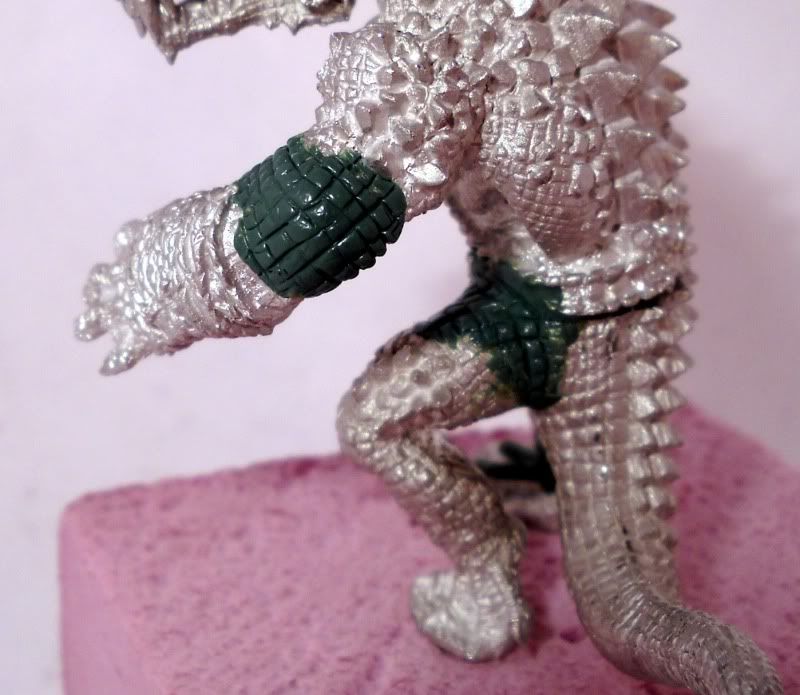
Since I finally have Greenstuff, I was able to start with some gap filling and scales. Nothing ground breaking, but hey, progress is progress!
 |  |
 | |
I'd love to get more done, but the more Greenstuff I add, the harder it is to hold the model without getting fingerprints all over. 1-2 more sessions of gap filling and scales, and then I can start adding the fun stuff.
w00t!
Eldar Paint Scheme Research
 I'm incredibly anxious to paint me some Eldar. I realize I have lots to do with the Pump Wagons, Gatorgents and Skorne, but side distractions are fun, right?
So, I'm slogging through CMON, looking for Eldar armies or models as inspiration. I'm not sure if I want to do a codex Craftworld, or make up a scheme.
For starters, here's Games Workshop's Studio schemes overview: LINK.
For starters, here's Games Workshop's Studio schemes overview: LINK.
Among the first 70 odd CMON pages of the over 200 I found using "eldar" (half of which are Dark Eldar, grr...) I found quite a few great examples of what can be done...
Monday, April 18, 2011
Battle Report: Morghoul v. Zerkova
My first time out with Skorne, trying an extended battlebox.
The lists:
Yes, I knew he was a point over going into the battle. I didn't think it'd be a big difference...
| Points: 26/25 Koldun Kommander Aleksandra Zerkova (*6pts) * Juggernaut (7pts) * Juggernaut (7pts) Cylena Raefyll & Nyss Hunters (Cylena and 9 Grunts) (10pts) Doom Reavers (Leader and 5 Grunts) (6pts) * Greylord Escort (2pts) | Points: 25/25 Master Tormentor Morghoul (*7pts) * Cyclops Brute (5pts) * Cyclops Savage (5pts) * Cyclops Savage (5pts) * Razorworm (4pts) * Titan Gladiator (8pts) * Aptimus Marketh (3pts) Paingiver Beast Handlers (Leader and 3 Grunts) (2pts) |
Yes, I knew he was a point over going into the battle. I didn't think it'd be a big difference...
Friday, April 15, 2011
Sunday, April 10, 2011
Pump Wagon Update
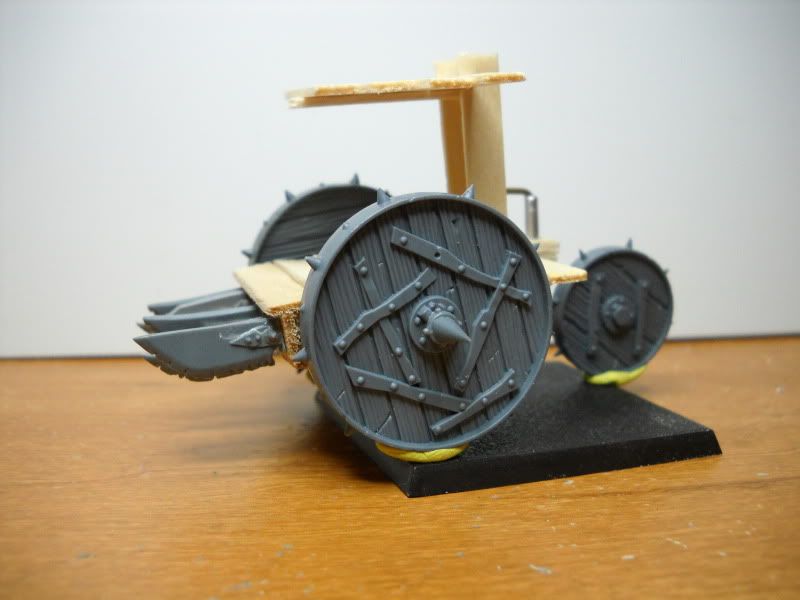
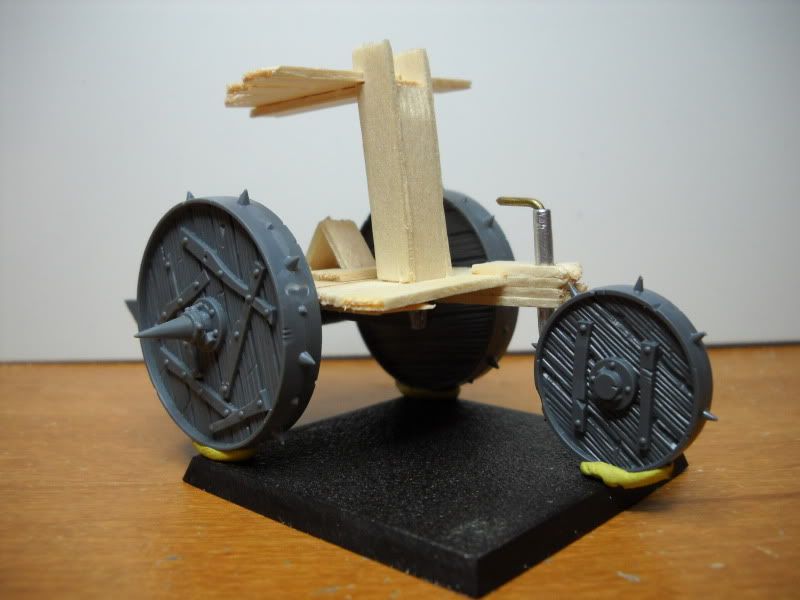
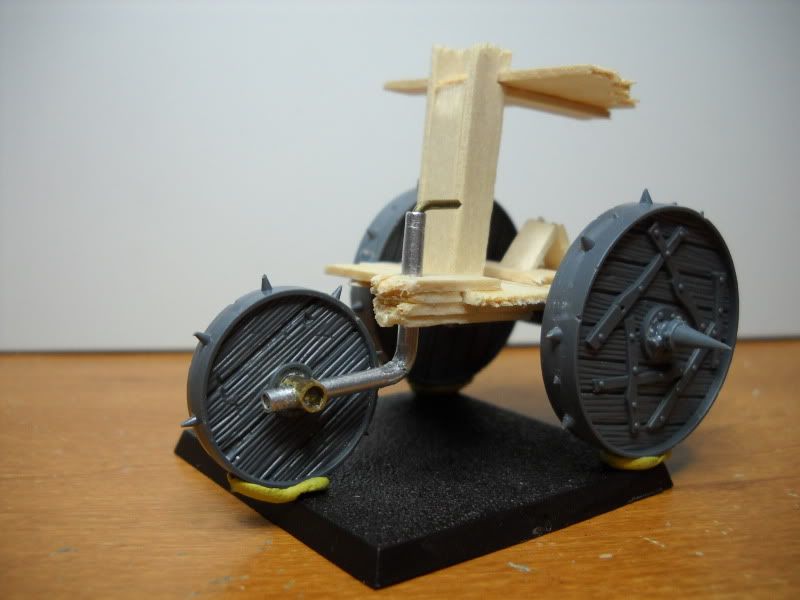
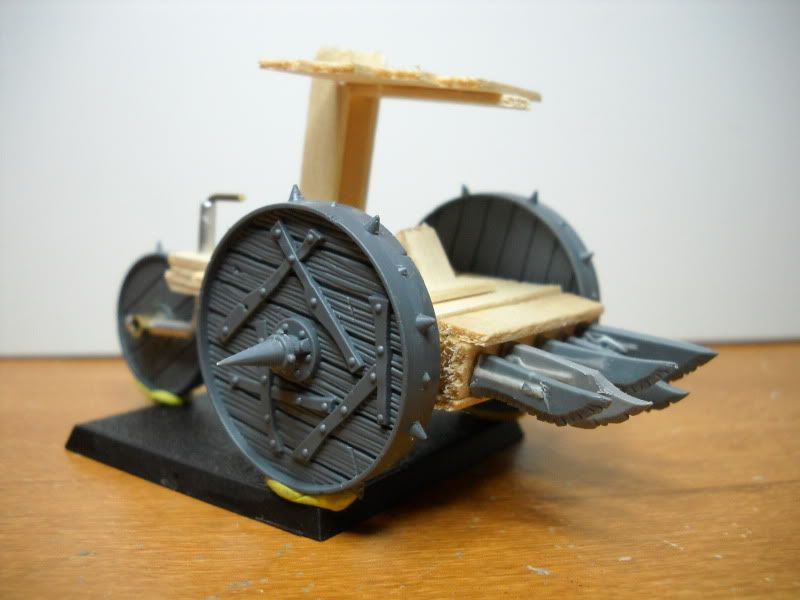
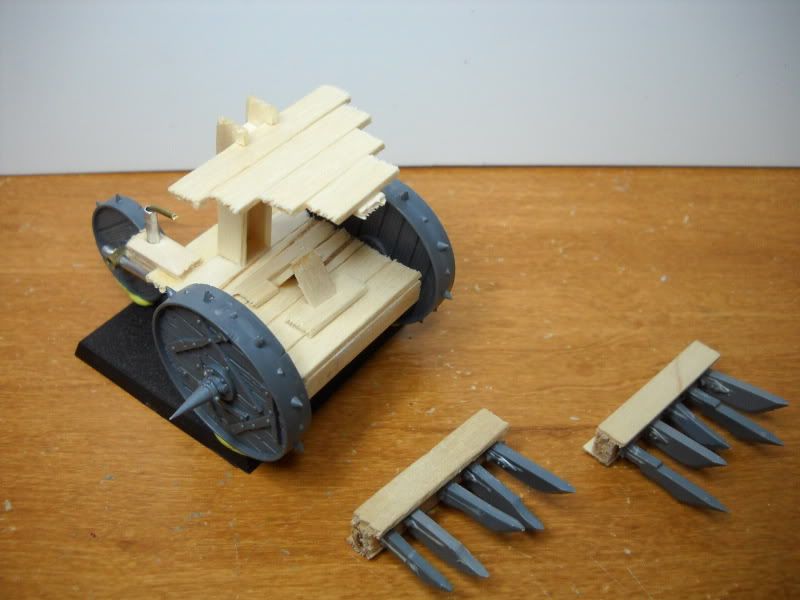
Yay! An update! Good progress this weekend. A second deck was added to allow some snotlings to throw stuff at enemies from on high. Also, a mechanism for attaching and turning the rear wheel was made. Lastly, a pair of front spikes were made and magnetized. One will be covered in mushrooms to represent the optional "spore attack" which is a one time use only ability for these wagons.
 |  |
 |  |
 | |
What do you think?
Saturday, April 9, 2011
How to: Basic Conversion
So, I've recently decided I want to try painting some Eldar. Yes, I know they're a GW product, but they look so damn cool! One of the auto-includes for almost any Eldar army is a Farseer HQ choice with the Doom spell. Doom lets any Eldar unit re-roll wound rolls on the targeted enemy unit / model. Wahoo! So, I figured a farseer model would be a good, cheap way to try out painting Eldar.
 |
| Studio Warlock Model |
The problem is, there isn't a Farseer model that has the pose I like.
What I did find was what are essentially lesser Farseers, called Warlocks. They're cheaper (points wise), and basically tag along with a unit to protect or guide them. One of them has the pose I want (and I'll probably buy him just to paint it, because IMO, it's an awesome model). I love the shooting pose here. Combined with the mask, it has a sense of stoicism and finality.
I want a Farseer that carries the same feeling!
Friday, April 8, 2011
Skornish Growth
A few weeks ago I stumbled across a find on bartertown.com. I snagged a full Praetorian Swordsmen unit for 50% off! I love finding PP models used. Since they're (basically) all metal, I know I can strip them, no matter what condition they are in. These were easy though. After pulling the super glue off, a quick inventory shows I have everything I'll need to assemble them (except I'm 1 base short...).
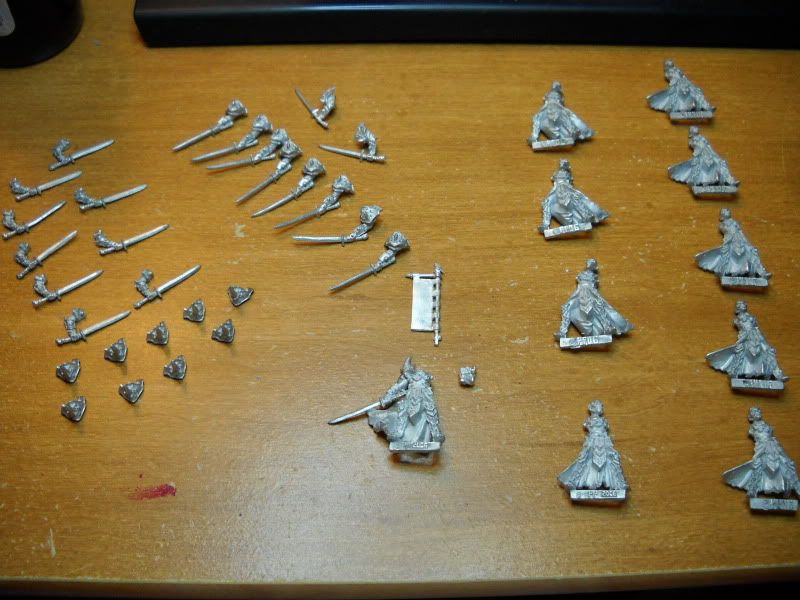

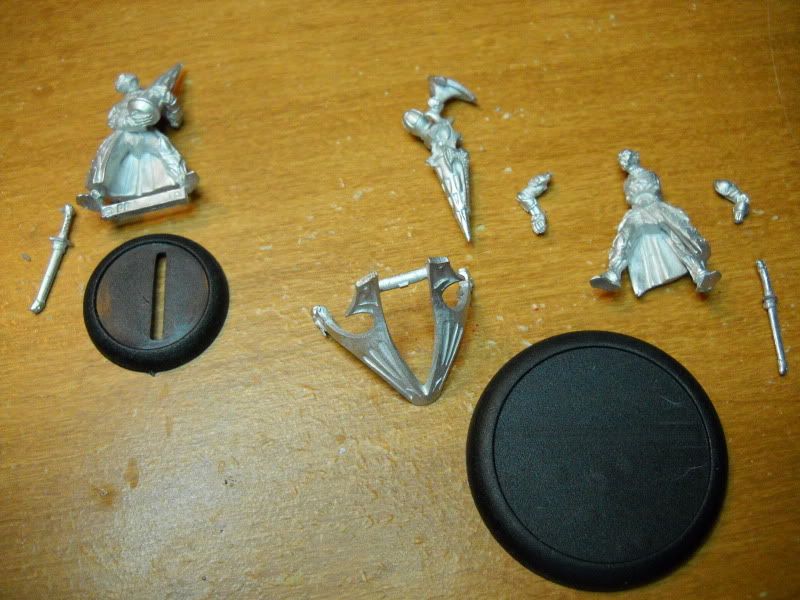
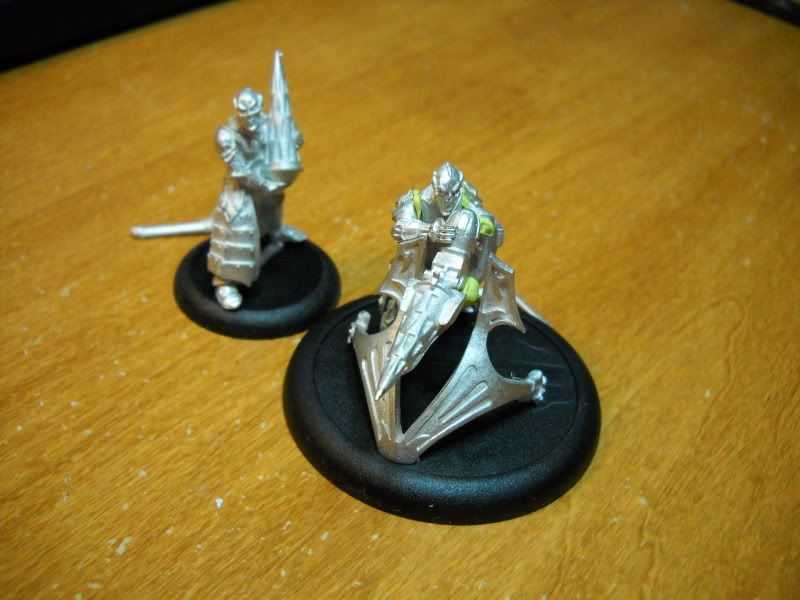
Here's what the parts look like out of the box, and mocked up with sticky-tac. I'll definitely need to pin this.
Also in the assembly line is a 2 pt model that will push the Beast Handlers out of position for painting this month: the Venator Flayer Cannon! PG_Lonely_Monk recently wrote a review of Skorne's artillery models, and I've wanted a Flayer Cannon for a while now. It's only 2 pts, fits into Xerxis' theme force, and offers some nice damage output against both hordes of infantry and harder targets. It gets more powerful the large the enemy base is (+1 against medium, +2 against large), and it has strafe for D3 total attacks. Not bad. That's up to 3 POW 12s or 3 POW 14s against a 'beast or 'jack. While that seems lackluster at first glance, remember it's coming at RAT7 and range 14.
The model looks pretty good too, though it looks to be about as easy to assemble as the battlebox was.
Here's what the parts look like out of the box, and mocked up with sticky-tac. I'll definitely need to pin this.
 |  |
Also, it should be perfect for Lost Hemisphere's April Paint the Target challenge.
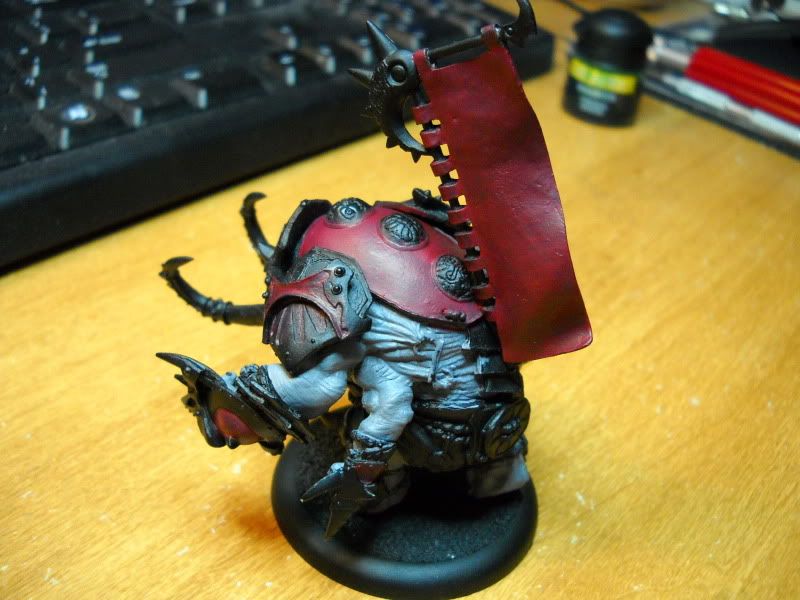
The last model related update for you today is a WIP of the Titan Gladiator! I got the skin basecoated as well as most of the red panels.
The reds need another coat or two, but the skin's ready for the next layer. I'm hoping the skin will be as easy as a brown wash (haven't decided which one yet) and some dry-brushing. Since this guy lives out in the desert, I'm fine with his skin being a bit chalky. We'll see how it turns out.
The last model related update for you today is a WIP of the Titan Gladiator! I got the skin basecoated as well as most of the red panels.
 |  |
Tuesday, April 5, 2011
Progress!
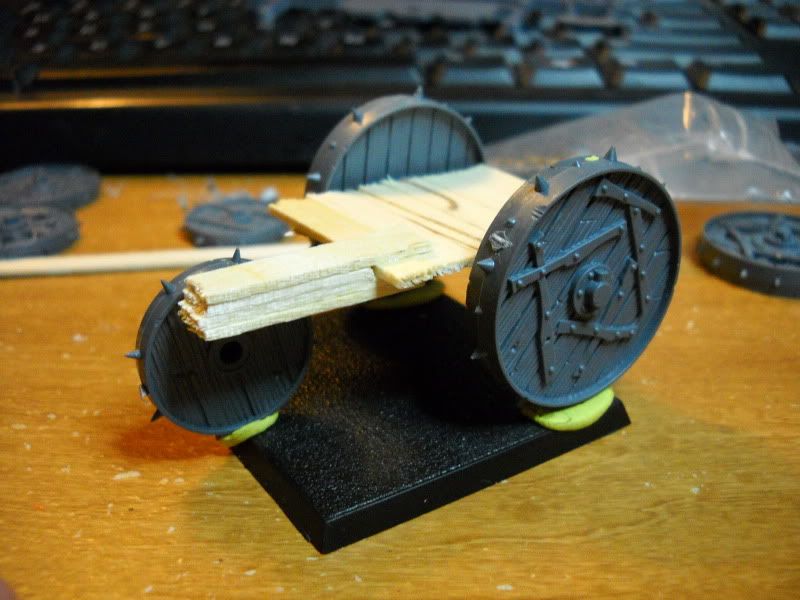
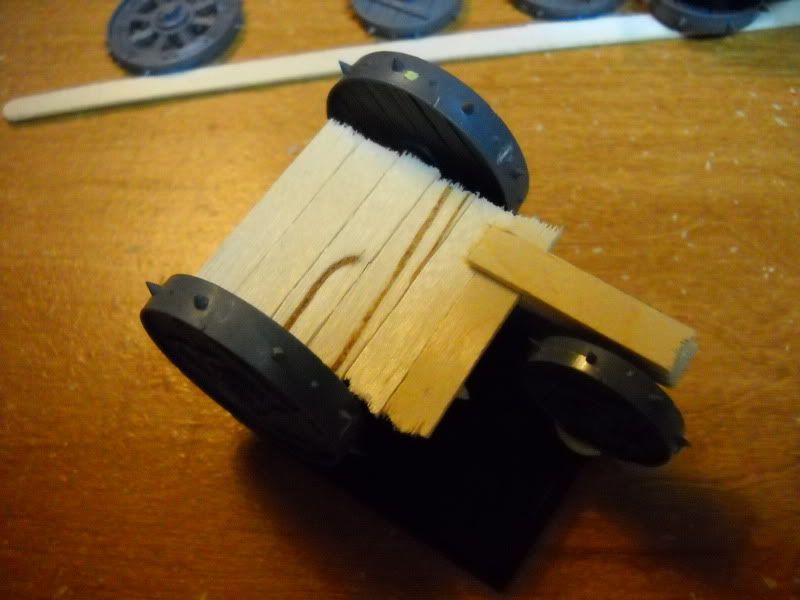
... on the Snotling Pump Wagons! I finally got all my parts in (except for the snotlings themselves). Between the 50mm bases, Skaven Screaming Bell wheels and Starbucks Stirring sticks, here's what I came up with after about two hours of fiddling around.
The snotling in the last picture was provided by the client along with lots of extra spiky bits and stuffs.
 |  |
 |  |
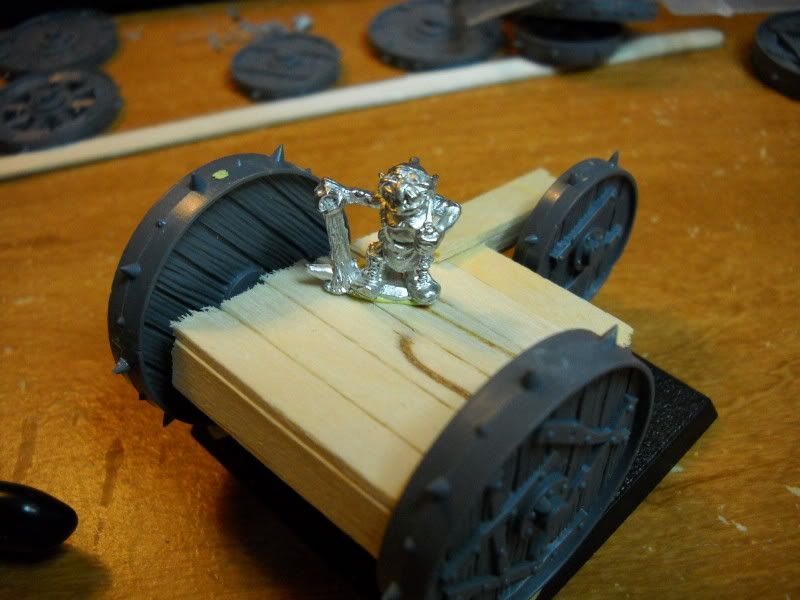 | |
Right now it almost feels too big. The front wheels are almost twice the size of a snotling. However, that fits right into the comical nature of the orcs and goblins.
Tell me what you think about it! For reference, the studio model can be viewed here.
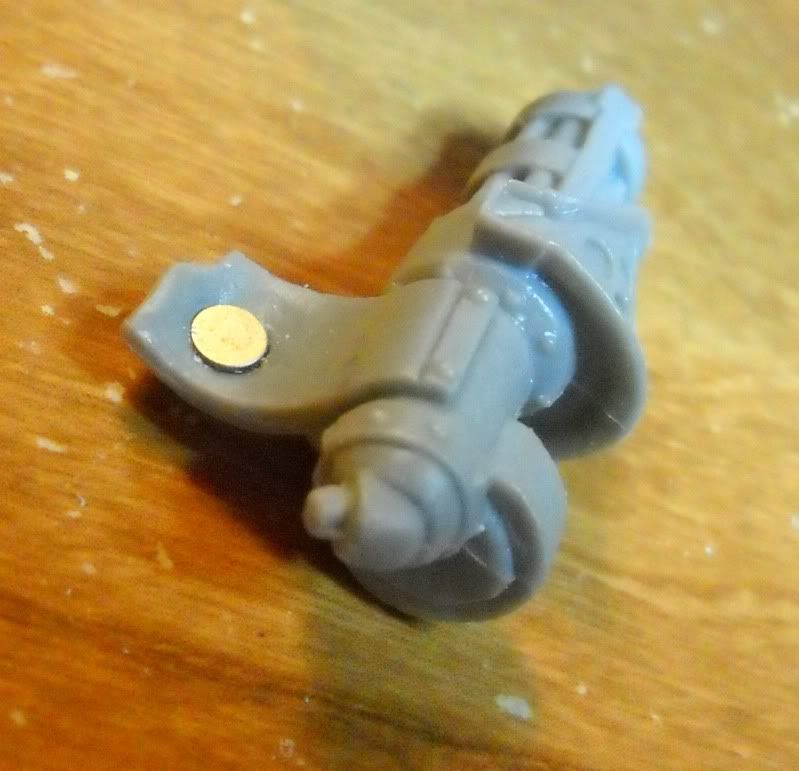
When ordering the bits for the Pump Wagons, I stumbled across a pair of Cyclone Chain Guns for my magnetized Cygnar Heavy ''jack. Some thin magnets later, and viola:
 | |
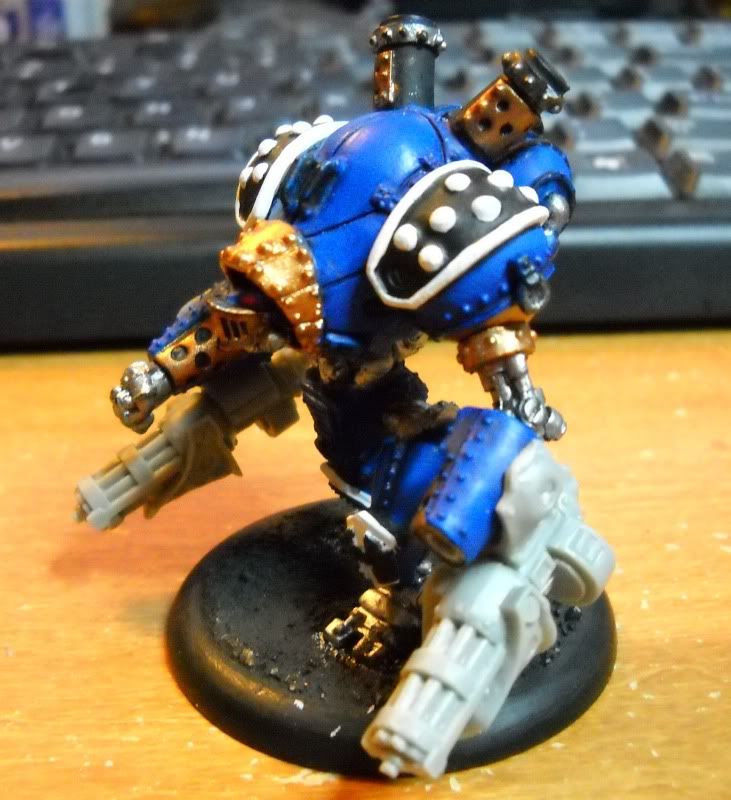 | 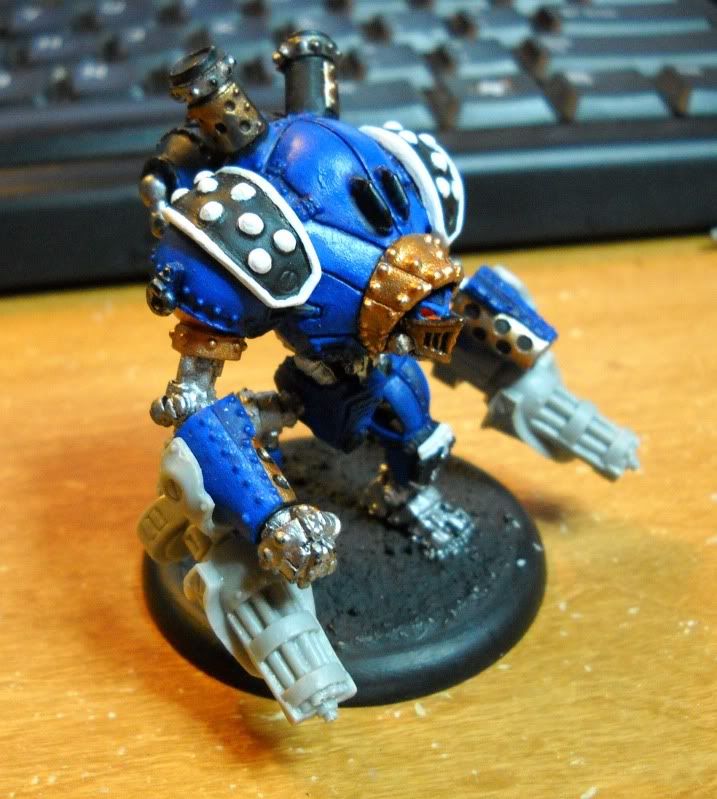 |
You may notice that the left hand is missing. Since this model originally came from the battle Box, the only right fist I have is for the Ironclad and has a giant mace in it. Thus starts the quest to find the bit! Bartertown.com, here I come!
Saturday, April 2, 2011
Wrastler Repose
So, as some of you may no by now, one of my side projects is to help Faultie with his Collective of Genteel Gatorfolk. One of the first things on the to-do list was a repose of the Blackhide Wrastler. The best part about this particular repose was that there was already a tutorial on how to do it. Gentleben, of BelloflostSouls.net wrote about how he did a repose for his Blackhide Wrastler back in November.

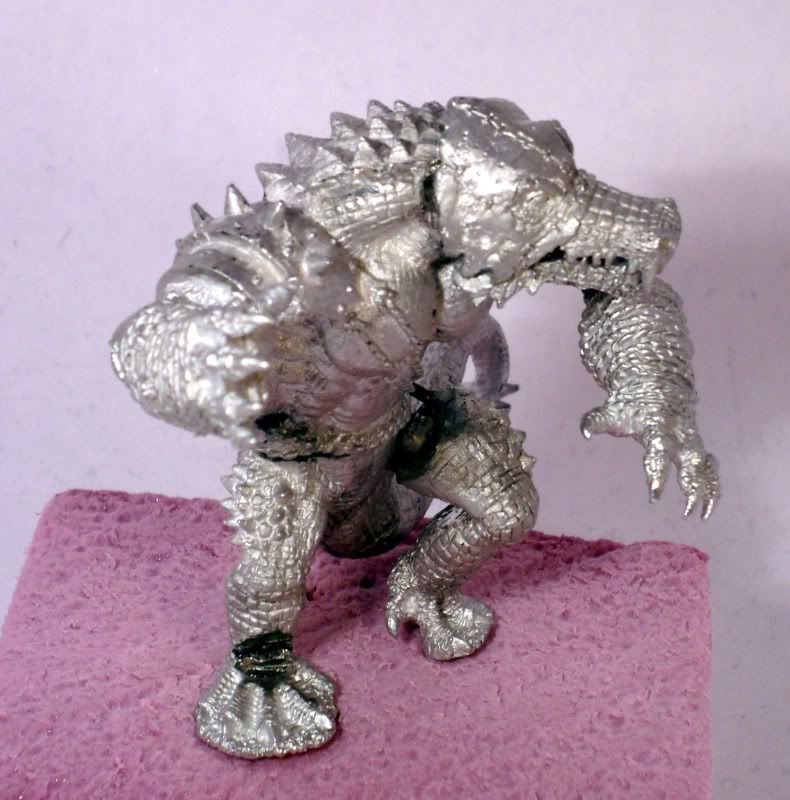
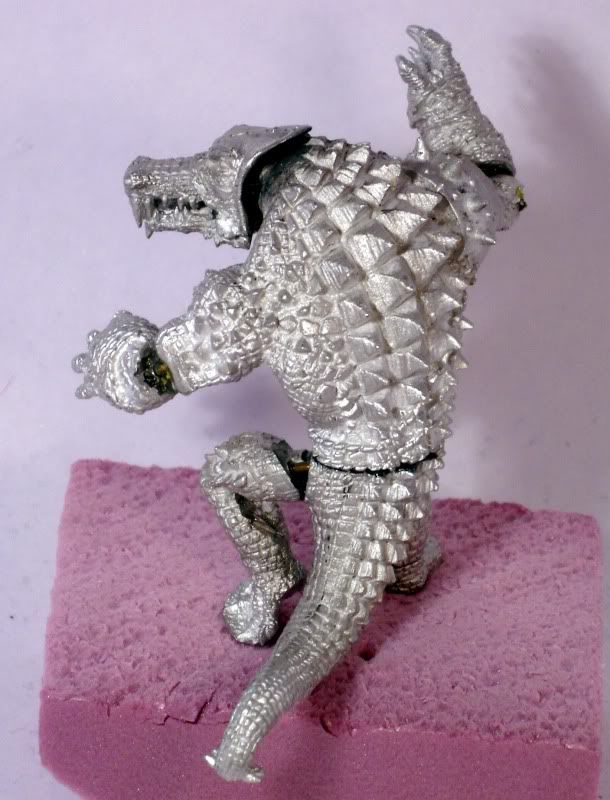
So with that article in mind, here's what I came up with:
 |  |
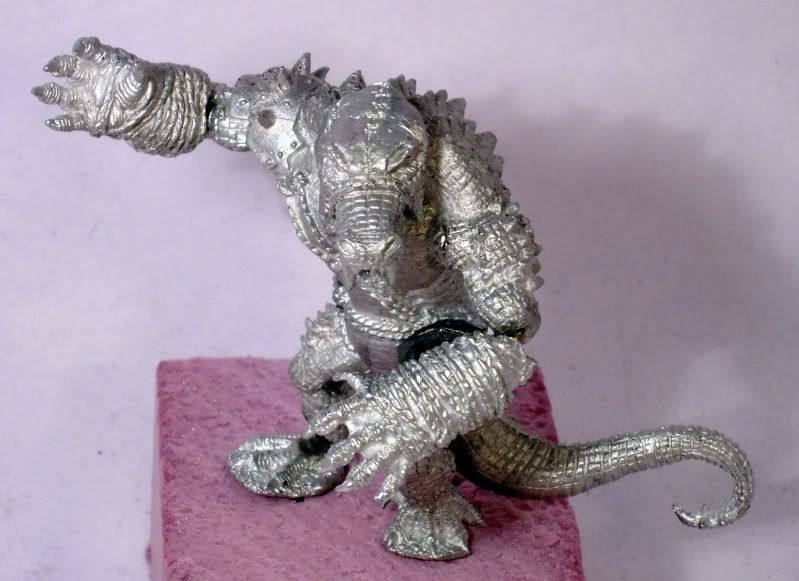 | |
You may note that it's not exactly the same as Gentleben's. A few modifications were made so that it can be further converted to better represent what a proper Genteel Gatorfolk would look like.
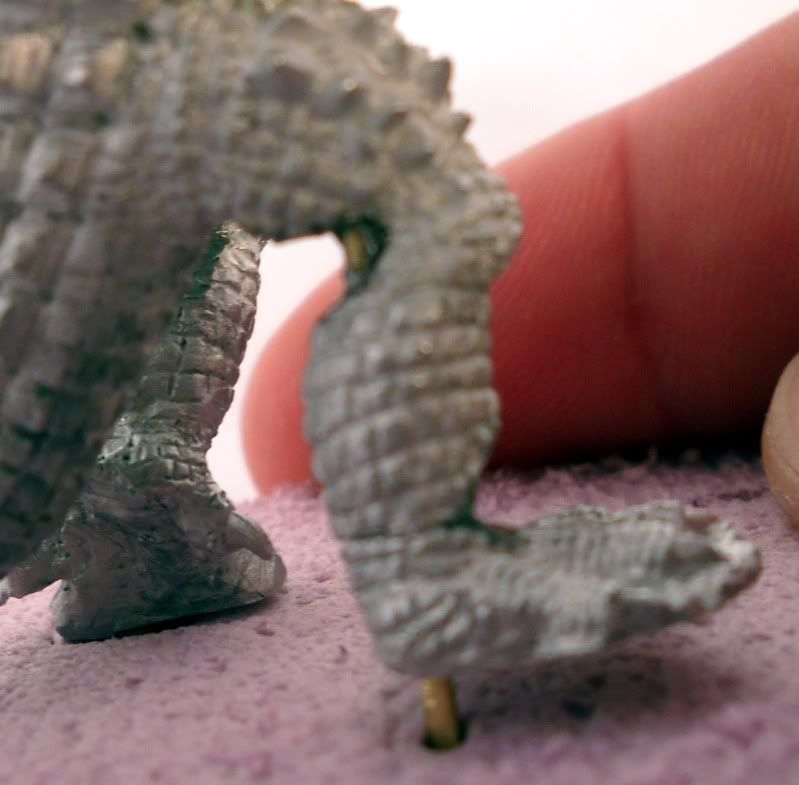
First, I re-used the bottom jaw. Gentleben gave his a completely new one out of greenstuff. After a few minutes of playing with the head pieces, I noticed that the bottom jaw fits inside the teeth of the top jaw rather nicely. A pin and some glue later, and it looks pretty good. The top two pictures show how well the pieces fit. No modifications were done to the pieces to get them that way. I did have to file down the back where it attaches to the head, but that'll get covered up with greenstuff, so it didn't have to be pretty.
Just like in the tutorial, the legs were modified to raise the body up. The ankle and knee of the model's right leg were cut, and the knee of the left leg was cut too. Here's detailed shots:
I first cut into the ankle joint. I went about halfway in. I then went and cut the knee joint. The scales and muscles give you a very clear line to cut on. It was fairly obvious when to stop. I then wedged my hobby knife in each cut and wiggled it around a but to pry stuff apart. It was too scary though - I felt like the blade would snap and go everywhere. So, I pulled out a set of pliers, and started working the joints.
After getting the right leg where I thought it should be, I cut into the left leg. This was a long cut - you can see where the leg looks too thin. I'll have to rebuild the calf and thigh muscle with greenstuff.
This leg was awful. It was so hard to bend. I had to use a small screwdriver and wedge it into the cut. By twisting it, I was able to open it bit by bit. At one point it slipped and the sharp bits on the thigh and the toe nails cut my thumb and finger. &#*&^ thing drew blood.
Once I had both legs opened up, I put pins in and began testing to be sure the flat parts on the bottom of the feet would line up. Thus the foam block you see under the miniature. If you look back at the right leg, you can see that the pin goes all the way up through the foot, calf and into the thigh. These joints were weak because they were thin and I wanted to be sure it would hold up. A big brass rod helps.
From there it was much simpler.
The right arm comes in two pieces, joining at the elbow. I just shaved the top and bottom of the arm part and then pinned the forearm at the right angle. Again, greenstuff will make the join smooth. The left arm is all one piece, so I had to cut it in order to change it. I hacked it apart at the elbow and then pinned it back where I wanted it.
So, the next step is to greenstuff all the gaps and make it look like a gatormans. Then we'll add the fun stuff. Here's a concept artist rendering. The artist may or may not have been sober.
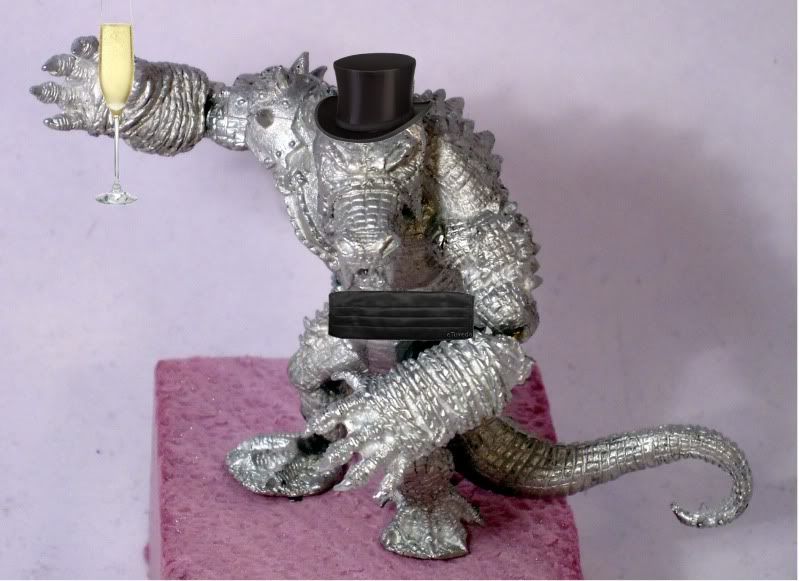 |
| A top hat, cummerbund and glass of chapagne... Why yes! |
Subscribe to:
Posts (Atom)