
So, to start off you'll need several supplies:
Supplies
Paint stripper:I prefer Castrol Super Clean
 (CSC), others use Simple Green, and still others use Brake Fluid or Oven Cleaner. I highly suggest not using Brake Fluid or Oven Cleaner. Brake Fluid is toxic and caustic, so you have to use gloves and you aren't supposed to put it down a drain. Oven cleaner is hard to find as a liquid, most of them come as an aerosol spray, thus it's difficult to use. The oven cleaners I've tried also eat plastic, so that's not cool. CSC and Simple Green are safe to use on plastic, can be put down the drain and are cleaners that were designed to be used with minimal protection (ie, gloves recommended but not required). They also smell great. Simple Green has a lively citrusy smell, and CSC smells like grape Jello.
Plastic cups:
I use cheap Solo cups
 . Any size will do. Get plenty, I often stack two cups inside each other just in case one has a hole and leaks.
Strainer:
Strainers
 are super cheap - a few dollars at a drug store or a grocery store. This will be a life saver, since it will keep small bits and pieces from going down the drain.
Toothbrush:
I've not found a difference in effectiveness between the $5 'firm bristle' ones and the freebies you get from the dentist. Just get them as cheap as possible and throw them away when they aren't performing well.
Picks:
Picks are great because they let you scrape out any paint in notches, crevasses or hard to reach places. Dental style
 ones work great but can break if you push too hard, so I prefer the more automotive
 oriented ones. I won't show how to use these, it's fairly straight forward. Hold them like a pencil and let them work for you - don't press hard at all. Also, do your best not to poke yourself. It hurts.
Hobby Knife:
A must have, a good Xacto knive
 will be your friend when you need to scrape a bit of paint off or cut off an old glob of super glue. Don't forget to have lots of replacement blades
too.
Misc:
- napkins or paper towel
- trashbag
The Process
Ok, so after you've gathered all your supplies, it's time to get crackin'!
I'm stripping some Legion models today. They were primed when I got them, and the primer didn't do well, they have a sandpaper like texture to them, thus they're getting the soak.
Since my Solo cups are a bit small, I typically break the models down into their parts, or as close to them as possible. This is almost always required for large models. If you aren't sure how a model goes together, see if you can find pictures of someone doing a conversion, etc. Pull and twist carefully!
Here's before and after:
Since my Solo cups are a bit small, I typically break the models down into their parts, or as close to them as possible. This is almost always required for large models. If you aren't sure how a model goes together, see if you can find pictures of someone doing a conversion, etc. Pull and twist carefully!
Here's before and after:


2) Lay down a few pieces of paper towel or a few napkins. While the trash bag will keep the paint stripper from getting through to the tabletop, the napkins / paper towel will keep it from running off the edge of the trash bag. One or the other's not enough so I use both the trash bag and a napkin.
3) Put some cups down on the paper towel / napkins. Remember to stack two cups in case one has a leak. Your setup should look something like this:

You'll notice I removed the bases. I have an assortment of new bases, and these models had super glue all over their feet holding them onto the bases. I use a pair of clippers to break up the bases. Only the carnivean and Lylyth's base were spared.

4) Take your models and divide them amongst your cups. Obviously use as many cups as you like. I prefer to only have the cups half full - cramming models into them can actually cause paint stripper to not get to parts, and they have to soak again. Thus, fewer is better. Plus, having them only halfway full means you can stir the parts so they get a good soak, and not have to worry about spilling.
5) Fill the cups with your chosen paint stripper - only enough to cover the models, no sense in wasting our expensive paint stripper!
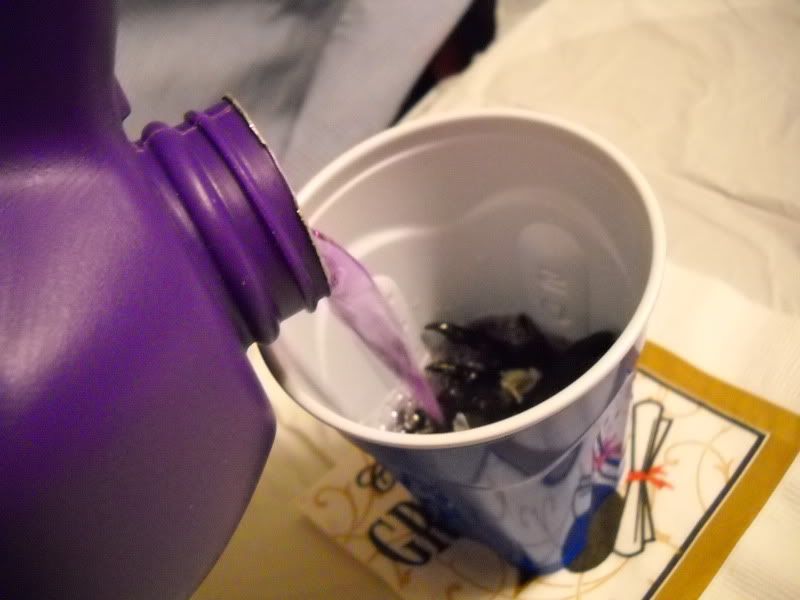 |
| Mmmmmm... Grape! |
NOTE: Do not be alarmed if you see bubbles coming from the liquid. Cleaners are typically mildly acidic, and if your models have metallic flakes, there can be a small chemical reaction between the cleaner's acid and the metal flakes. It's normal, and not something to freak out about. It's another good reason to not fill the cups to the top though!
If smell is an issue (because you can't leave the stuff outside or leave a window open), check out this tip.
6) Wait. You can wait anywhere from 1 hour to 2 months. (I forgot about some models in my parent's basement for about 2 months. They retained 100% of their detail) I've found 2-3 hours is about all you need to wait, though for simplicity's sake, I usually leave stuff overnight.
I waited roughly 3 hours during this tutorial.
7) When you're done waiting, go to the sink and grab your strainer, toothbrush and some napkins / paper towel. Put the paper towel down on one side of the sink (since cleaned models will be wet) and your cups on the other.

8) Hold the strainer in one hand over the sink, and pour a cup into it - be ready for the models to land in the cup - they're heavier than you think. Alternately, you can rest the strainer in the sink and just steady it, like I did since I had to hold the camera.

9) Turn the water on - enough to get a solid stream, but not blasting. you want running water because you need to be able to see, and filling the sink with water won't really do that. Since the cleaner suds up, filling the sink just turns it into a bubble bath and it's not very helpful.
10) Grab a part out of the strainer and go at it with the tooth brush!
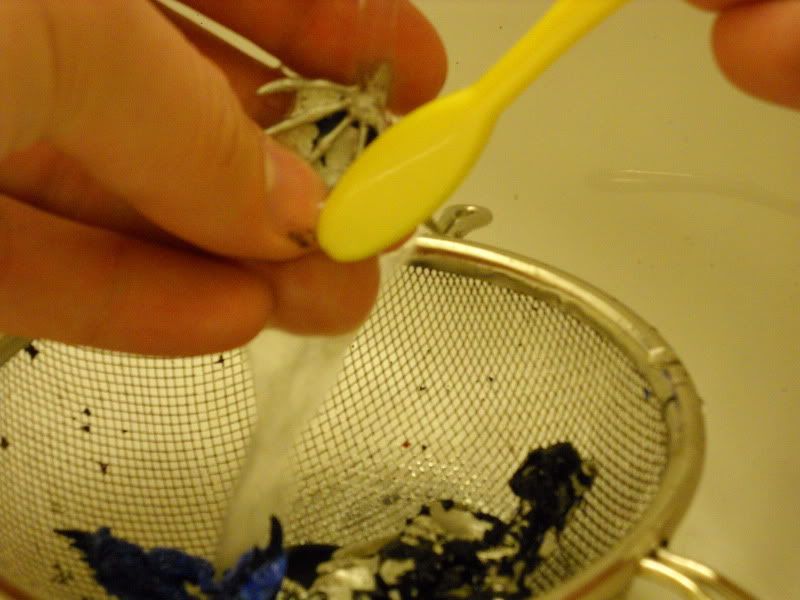 |
Yay for my miniature tripod , which let me take this shot! , which let me take this shot! |
Here are a few tips for when you're working with the toothbrush:
- Hold the brush at different angles to keep your hand from getting tired.
- Let the bristles do the work, you don't have to press very hard at all.
- Draw the brush parallel to the crevasses and grooves - that will dislodge paint.
- Don't spend too much time on a tenacious bit - you can get it later with the picks
- Rinse the part under the water often to clear off paint chips and suds.

12) Repeat for all your parts. Take a break every so often to stretch your back or let someone else use the bathroom.
13) Let the parts dry. You can't super glue them while they're wet, so watch a movie, clean the house, walk the dog, etc. I typically let models dry over night, or toss them in a paper towel if I need them dry sooner.
14) Use your picks and hobby knife to get rid of any remaining paint or super glue if you want. Just be careful - those tools are sharp and hurt like hell for a week if you really get yourself.
Good Luck!
13) Let the parts dry. You can't super glue them while they're wet, so watch a movie, clean the house, walk the dog, etc. I typically let models dry over night, or toss them in a paper towel if I need them dry sooner.
14) Use your picks and hobby knife to get rid of any remaining paint or super glue if you want. Just be careful - those tools are sharp and hurt like hell for a week if you really get yourself.
Good Luck!

No comments:
Post a Comment